A 50A manual transfer switch safely connects a generator to power your home during outages, preventing backfeeding and offering a reliable power solution.
This essential device allows seamless switching between utility and generator power, ensuring critical circuits remain operational when the grid fails.
What is a Manual Transfer Switch?
A manual transfer switch is a crucial safety device designed to isolate your home’s electrical system from the utility grid when using a portable generator. Unlike automatic transfer switches, it requires manual operation – you physically switch between utility and generator power.
This prevents “backfeeding,” a dangerous situation where generator power flows back onto utility lines, potentially endangering line workers. Essentially, it creates a safe, controlled connection for your generator, allowing you to power selected circuits during an outage.
It’s a valuable component for anyone relying on a portable generator for emergency power, offering a secure and code-compliant solution, as highlighted by resources like This Old House.
Why Use a 50A Transfer Switch?
A 50A transfer switch provides a significant upgrade over relying on extension cords during power outages. It allows you to power more appliances simultaneously, offering greater convenience and comfort. Eliminating the hassle of multiple extension cords also reduces tripping hazards and potential electrical issues.
More importantly, it’s a safe solution. Backfeeding prevention is paramount, and a transfer switch, as demonstrated by This Old House, ensures this. A 50A switch can handle higher wattage demands, supporting essential systems like refrigerators, furnaces, and well pumps, making it ideal for larger homes or greater power needs.
Safety Considerations & Backfeeding Prevention
Backfeeding – when generator power flows back into the utility lines – is extremely dangerous to line workers and neighbors. A 50A manual transfer switch specifically prevents this by physically isolating your home’s electrical circuits from the grid.
Proper installation, adhering to local electrical codes and permits, is crucial. Always disconnect utility power before working on the electrical system. Using flexible metal conduit (FMC), as noted in online resources, ensures secure wiring. Prioritize safety; if unsure, consult a qualified electrician. Ignoring these precautions can lead to severe injury or even fatality.
Understanding Your Electrical System
Before installing a 50A transfer switch, familiarize yourself with your main service panel, circuit breakers, and overall home power demands for safe operation.
Main Service Panel Overview
Your main service panel is the heart of your home’s electrical system, receiving power from the utility company. It houses circuit breakers that protect individual circuits from overloads.
Understanding its layout is crucial before installing a 50A transfer switch. Locate the main breaker, which shuts off all power. Identify available spaces for adding a breaker to accommodate the transfer switch’s wiring.
Carefully inspect the panel’s amperage rating – it must be sufficient to handle the generator’s output alongside existing loads. Always prioritize safety and consult a qualified electrician if you’re unsure about any aspect of your electrical panel.
Circuit Breaker Identification
Identifying circuit breakers is vital for selecting which loads will be powered by your generator during an outage. Each breaker controls a specific area or appliance in your home.
Carefully label each breaker – if they aren’t already – by testing and noting which lights, outlets, or appliances they control. This allows for informed load management when using the 50A transfer switch.
Prioritize essential circuits like refrigerators, heating systems, and medical equipment. Avoid overloading the generator by exceeding its wattage capacity; careful breaker selection is key to safe operation.
Determining Your Home’s Power Needs
Calculating your home’s power needs is crucial before installing a 50A transfer switch. Start by listing essential appliances you want to power during an outage – refrigerator, furnace, lights, and medical devices.
Find the wattage listed on each appliance’s nameplate. Add up the running watts of all essential items. Remember to account for starting watts, which are higher for motors.
A 50A, 120/240V transfer switch can handle approximately 12,000 watts. Ensure your total wattage requirement doesn’t exceed this limit to avoid overloading the generator and switch.
Choosing the Right 50A Transfer Switch
Selecting the correct 50A transfer switch involves considering NEMA configurations, voltage, and amperage ratings, alongside choosing between all-in-one or separate component systems.
NEMA Configurations (NEMA 14-50)
Understanding NEMA configurations is crucial when selecting a 50A transfer switch, with NEMA 14-50 being a common standard for generator connections. This configuration features a 4-prong plug, providing 125/250V and 50 amps of power.
It’s designed for heavy-duty applications and ensures a secure and reliable connection between your generator and the transfer switch. Many transfer switches utilize flexible metal conduit (FMC) to connect to the main panel, often incorporating this NEMA 14-50 plug for generator compatibility.
Confirming your generator’s plug matches this configuration is essential for a successful installation, avoiding the need for adapters and ensuring optimal performance during power outages.
Voltage and Amperage Ratings
Selecting the correct voltage and amperage ratings is paramount for a safe and effective 50A transfer switch installation. Most residential systems operate at 120/240V, so the transfer switch must match this standard. A 50-amp transfer switch allows you to power up to 50 amps of essential circuits during an outage.
However, it’s vital to calculate your home’s total power needs to ensure the switch can handle the load. Overloading the switch can cause damage or safety hazards. Carefully assess the amperage draw of appliances you intend to power with the generator.
Matching these ratings guarantees compatibility and prevents electrical issues.
Transfer Switch Types: All-in-One vs. Separate Components
Choosing between an all-in-one transfer switch and separate components impacts installation complexity. All-in-one units integrate the switch and circuit breakers into a single enclosure, simplifying the process and often preferred for DIY installations. They offer a streamlined solution, reducing wiring and potential errors.
Separate component systems involve a separate manual transfer switch and individual circuit breakers. This approach provides greater flexibility in circuit selection but requires more extensive wiring and a deeper understanding of electrical systems.
Consider your electrical expertise and project scope when deciding.

Installation Process: Preparation
Prior preparation is crucial; obtain necessary permits, gather tools and materials, and, most importantly, safely disconnect utility power before starting installation.
Permits and Local Electrical Codes
Before commencing any electrical work, contacting your local permitting office is absolutely essential. Regulations regarding generator transfer switch installations vary significantly by location, and failing to comply can result in fines or necessitate rework.
Specifically, inquire about required permits for electrical modifications and generator connections. Your local Power Company (POCO) often dictates specific rules and laws you must follow. These codes often address wiring methods, grounding requirements, and the type of transfer switch permitted.
Ensure the 50A transfer switch you choose is listed and labeled by a recognized testing laboratory (like UL) to meet safety standards. Adhering to these codes guarantees a safe and legally compliant installation.
Tools and Materials Required
A successful 50A transfer switch installation demands specific tools and materials. Essential tools include screwdrivers (various types), wire strippers, pliers, a voltage tester, a conduit bender (if needed), and a drill with appropriate bits. Safety gear like gloves and eye protection are paramount.
Materials needed encompass the 50A transfer switch itself, appropriately sized electrical wiring (THHN/THWN), flexible metal conduit (FMC) for wire runs, conduit connectors, circuit breakers, and grounding hardware.
Don’t forget wire nuts, electrical tape, and mounting hardware. Having all components readily available streamlines the process and minimizes delays during installation.
Disconnecting Utility Power
Before commencing any wiring related to the 50A transfer switch, completely disconnect utility power. Locate your main service panel and identify the main breaker. This is typically a larger breaker, often at the top of the panel.
Switch the main breaker to the “OFF” position. Confirm power is off using a non-contact voltage tester on various circuits within the panel. This crucial step prevents electrical shock and ensures a safe working environment.
Double-check that no circuits are energized before proceeding. Safety is paramount; never assume the power is off – always verify!
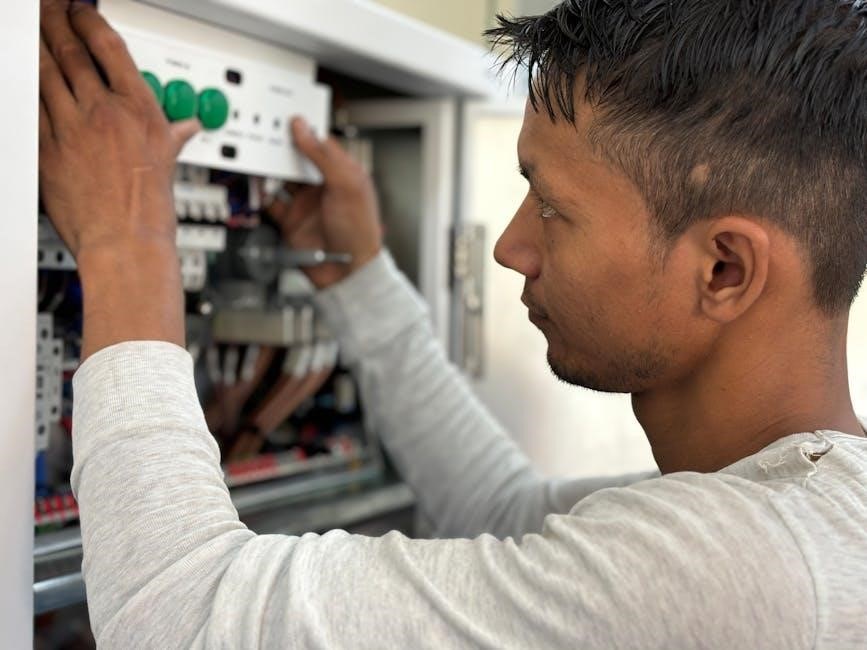
Installing the Transfer Switch
Securely mount the transfer switch enclosure near the main panel, following manufacturer guidelines. Then, carefully wire it to the panel, utilizing flexible metal conduit (FMC).
Mounting the Transfer Switch Enclosure
Proper mounting is crucial for a safe and functional installation. Select a location near your main service panel, ensuring easy access for operation and maintenance. The enclosure should be mounted securely to a wall stud or other solid structural member, capable of supporting its weight.
Use appropriate mounting hardware – screws or bolts – suitable for the wall material. Ensure the enclosure is level to facilitate correct wiring and operation. Maintain the required clearances around the enclosure, as specified by local electrical codes, to allow for safe access and ventilation. Double-check the mounting before proceeding with the wiring phase.
Wiring the Transfer Switch to the Main Panel
Carefully run wires from the transfer switch to the main service panel, typically using flexible metal conduit (FMC) for protection. Ensure the wires are sized correctly for the 50A load, adhering to electrical code requirements. Connect the wires to a dedicated breaker space within the main panel, avoiding existing circuits.
Properly label all connections for easy identification. Tighten all connections securely to prevent loose wiring and potential hazards. Grounding is critical; ensure a solid ground connection between the transfer switch and the main panel. Always double-check your wiring against the manufacturer’s instructions.
Using Flexible Metal Conduit (FMC)
Flexible Metal Conduit (FMC) provides essential protection for wires running between the transfer switch and the main service panel. It safeguards against physical damage and offers a grounded pathway. Many transfer switches include FMC, simplifying installation. Carefully feed the wires through the conduit before securing the connectors to both the switch and panel.
Ensure the FMC is properly sized for the wire gauge and quantity. Tighten the connectors securely to maintain grounding continuity and prevent moisture ingress. Avoid sharp bends in the FMC, as this can damage the wires.

Connecting the Generator
Connecting the generator requires a NEMA 14-50 plug and ensuring proper grounding for safe operation. Verify compatibility before linking to the transfer switch.
Generator Cord Requirements (NEMA 14-50 Plug)
Utilizing the correct generator cord is paramount for safe and efficient operation with a 50A manual transfer switch; A NEMA 14-50 plug is typically required, as it’s designed to handle the higher amperage demands of a whole-house generator setup.
This heavy-duty plug and cord configuration ensures a secure connection and minimizes the risk of overheating or electrical hazards. The cord’s gauge (thickness) must be appropriate for the length to prevent voltage drop. Longer runs necessitate thicker gauge wiring.
Always inspect the cord for damage before each use, and never use a damaged cord. Consider a direct connection or a high-quality, appropriately rated extension cord if the generator cannot be positioned close enough to the transfer switch.
Connecting the Generator to the Transfer Switch
Carefully connect the generator to the transfer switch, ensuring the NEMA 14-50 plug is firmly inserted into the designated receptacle on the switch enclosure. Double-check the connection before starting the generator to prevent any accidental disconnections during operation.
Prior to starting, verify the transfer switch is in the ‘generator’ position, isolating your home from the utility grid. This prevents dangerous backfeeding. Once connected, start the generator according to the manufacturer’s instructions.
Regularly inspect the connection point for any signs of wear or looseness. A secure connection is vital for safe and reliable power transfer.
Ensuring Proper Grounding
Proper grounding is paramount for safety when using a 50A manual transfer switch and a generator. The generator must be correctly grounded to prevent electrical shock and ensure the transfer switch operates safely.
Typically, this involves connecting a grounding wire from the generator’s grounding terminal to a grounding rod driven into the earth, or to the home’s grounding system. Verify the transfer switch enclosure is also properly grounded to the main electrical panel.
Never bypass or disable the grounding system; it’s a critical safety feature. Consult a qualified electrician if you are unsure about proper grounding procedures.
Testing and Operation
After installation, thoroughly test the 50A transfer switch to confirm proper function. Practice switching between power sources and manage loads effectively.
Regular testing ensures readiness for outages and safe, reliable operation of your generator system.
Initial Testing Procedure
Before relying on your 50A manual transfer switch during an actual power outage, a comprehensive initial testing procedure is crucial for safety and functionality. With utility power present, carefully switch the transfer switch to the “generator” position.
Verify that only the circuits connected to the transfer switch are now powered by the generator; circuits remaining on the utility side should be without power. Then, switch back to the “utility” position, confirming a return to normal operation.
This process validates the switch’s proper operation and prevents potential hazards. Always double-check connections and ensure proper grounding before and after testing.
Switching Between Utility and Generator Power
Operating a 50A manual transfer switch requires a deliberate process to ensure safe and efficient power transitions. When utility power fails, start your generator according to its manufacturer’s instructions. Once stable, switch the transfer switch from “utility” to “generator”.
This isolates your home from the grid and powers selected circuits via the generator. To revert to utility power, switch the transfer switch back to “utility” after the grid is restored.
Never operate the transfer switch while the generator is running, and always disconnect the generator before performing maintenance.
Load Management and Circuit Selection
Effective load management is crucial when using a 50A transfer switch. Determine essential circuits – refrigerator, furnace, lights – and connect only these to the transfer switch. Avoid overloading the generator by summing the wattage of connected appliances.
Prioritize circuits to stay within the generator’s capacity. Running too many high-wattage devices simultaneously can trip the generator’s breaker or damage equipment.
Carefully select circuits, understanding that a 50A switch has limitations; it won’t power the entire house. Strategic circuit selection maximizes usability during outages.
Champion 30-Amp Manual Transfer Switch Installation (Canada Specific)
Canadian installations of Champion transfer switches require adherence to local electrical codes and may differ from US practices, documented through homeowner videos and guides.
Canada-Specific Installation Considerations
Electrical code variations are paramount in Canada, differing significantly from US standards, necessitating careful attention during a Champion 30-amp manual transfer switch installation. Homeowners must verify local regulations regarding wiring methods, grounding requirements, and inspection protocols before commencing any work.
Permitting processes can also vary by province and municipality, potentially requiring detailed electrical diagrams and professional electrician sign-off. Utilizing a qualified electrician familiar with Canadian Electrical Code is strongly advised to ensure compliance and safety. Documentation of the entire installation process, including permits and inspections, is crucial for future reference and potential resale of the property.
Cold-weather considerations, such as conduit flexibility and potential ice buildup, should also be factored into the installation plan.
Documentation of Installation Process
Meticulous record-keeping is vital throughout the 50A manual transfer switch installation. This includes retaining all permits issued by local authorities, detailed photographs of wiring connections before enclosure cover installation, and a comprehensive list of all materials used – wire gauge, conduit type, and switch specifications.
Diagrams illustrating the wiring configuration, clearly showing connections to the main service panel and generator inlet, are essential for future troubleshooting or modifications. Keep copies of the transfer switch’s technical specifications and the generator’s manual readily accessible.
Post-installation inspection reports from electrical inspectors should be archived, confirming code compliance and safe operation.
Technical Specifications of Champion MTS
Champion’s Manual Transfer Switches (MTS), like the 30-amp model 20119, are designed for portable generator integration. Key specs include a maximum wattage capacity, typically around 7500 watts for a 30-amp model, and a voltage rating of 120/240V AC.
The MTS features a NEMA 14-50 inlet for generator connection, requiring a compatible generator cord. It’s constructed with a robust steel enclosure, suitable for indoor installation. Amperage ratings vary; a 50A model supports higher wattage appliances.
Important considerations include the number of circuits selectable and adherence to Canadian Electrical Code (CEC) standards for Canadian installations.

Generac Transfer Switch Installation Instructions
Generac transfer switches facilitate seamless connection to your generator, powering essential circuits during outages. Follow their documentation for safe and correct installation procedures.
Proper wiring and adherence to local codes are crucial for optimal performance and safety.
Connecting to and Powering with Generac
Connecting a Generac generator to your installed transfer switch requires careful attention to detail and adherence to safety protocols. Ensure the generator’s power output matches the transfer switch’s specifications – typically a NEMA 14-50 plug configuration for 50A models.
Before starting the generator, verify the transfer switch is in the ‘generator’ position, isolating your home from the utility grid; Once running, the generator will supply power through the switch to the pre-selected circuits. Always prioritize safety by ensuring proper grounding and following Generac’s specific documentation for your transfer switch series, like the 4000 Series, for manual operation guidance.
Generac Transfer Switch Documentation
Generac provides comprehensive documentation for its transfer switches, crucial for safe and correct installation and operation. These manuals detail specific wiring diagrams, component lists, and troubleshooting guides tailored to each model, including the popular 4000 Series.
Accessing these resources is vital for understanding the switch’s functionality and adhering to local electrical codes. Documentation covers manual operation procedures, emphasizing the importance of isolating from the utility grid before generator connection. Always consult the official Generac documentation for your specific 50A transfer switch model before attempting any installation or maintenance work.
Manual Operation of 4000 Series Transfer Switches
The Generac 4000 Series transfer switches require a specific manual operation procedure for switching between utility and generator power. This involves carefully positioning the switch handle to select either the “Utility” or “Generator” source, ensuring complete disconnection from one before connecting to the other.
Documentation stresses the importance of verifying the generator is running stably before switching over. Proper operation prevents backfeeding and protects both your home’s electrical system and utility workers. Always refer to the official Generac manual for detailed step-by-step instructions specific to your 50A model.