
Topdeep Heat Press Manual: A Comprehensive Guide
This manual details the Topdeep heat press, a versatile 8-in-1 machine, ideal for t-shirts, hats, mugs, and plates․
It covers setup, operation, and maintenance, ensuring optimal performance and longevity․
Explore various attachments for diverse crafting projects, maximizing your creative potential!
Topdeep heat presses represent a significant advancement in crafting and customization technology, offering a comprehensive solution for a wide array of heat transfer applications․ These machines, particularly the popular 8-in-1 models available on platforms like Amazon․com, are designed for both hobbyists and small businesses seeking versatility and efficiency․
The core functionality revolves around applying heat and pressure to transfer designs onto various substrates, including t-shirts, apparel, hats, mugs, and even ceramic plates․ Topdeep presses distinguish themselves through their multi-functional capabilities, consolidating multiple machines into a single, space-saving unit․
Current models, such as the Topdeep Pro, increasingly incorporate a 30oz tumbler press alongside the standard attachments – a 15×15” or 15×12” t-shirt press, a 5․5×3” hat press, 6oz and 11oz mug presses, and 5” & 6” plate presses․ This adaptability makes Topdeep presses a valuable asset for anyone involved in personalized gift creation, promotional merchandise, or custom apparel production․ Understanding the nuances of each attachment is key to unlocking the full potential of your Topdeep heat press․
Understanding the 8-in-1 Functionality

The 8-in-1 designation of Topdeep heat presses signifies their ability to perform eight distinct heat transfer operations with interchangeable attachments․ This core feature dramatically expands the machine’s utility beyond simple t-shirt pressing․ The standard configuration includes a 15×15” (or 15×12”) swing-away platen for t-shirts, a 5․5×3” attachment for curved surfaces like hats, and a series of mug presses accommodating 6oz and 11oz standard mugs․
More recent Topdeep Pro models elevate this functionality by integrating presses for 12oz and 17oz latte mugs (cone-shaped) and dedicated presses for 5” and 6” ceramic plates․ Crucially, the inclusion of a 30oz tumbler press in newer iterations broadens the scope to include popular insulated drinkware․
Each attachment easily swaps onto the central heating element, allowing for quick transitions between projects․ Mastering these changes and understanding the specific temperature and time requirements for each application are vital to achieving professional-quality results․ The 8-in-1 design offers significant cost savings and space efficiency compared to purchasing individual machines․
Key Components of the Topdeep Heat Press
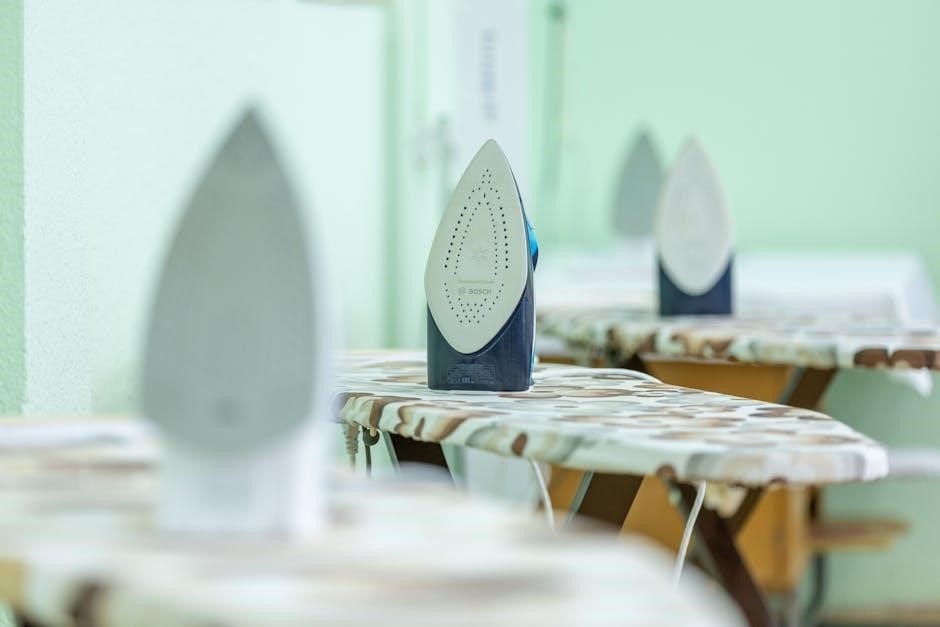
The Topdeep heat press comprises several essential components working in unison to deliver consistent and reliable heat transfer․ The core is the swing-away platen, typically 15×15” or 15×12”, providing ample surface area and safe operation․ A robust heating element ensures even heat distribution, crucial for quality transfers․
The digital control panel allows precise temperature and time adjustments, displayed in clear, easy-to-read formats․ A pressure adjustment knob controls the downward force, adapting to different materials․ Included are various interchangeable attachments: hat press (5․5×3”), mug presses (6oz, 11oz, 12oz, 17oz), and plate presses (5” & 6”)․
A sturdy frame provides stability, while the silicone base protects your work surface․ Teflon sheets (often included) prevent sticking and facilitate easy cleanup․ Understanding the function of each component is key to proper operation and maintenance, maximizing the lifespan and performance of your Topdeep heat press․
Safety Precautions and Guidelines
Prioritizing safety is paramount when operating the Topdeep heat press․ Always wear heat-resistant gloves to protect your hands from burns․ Ensure the machine is placed on a stable, level surface, away from flammable materials․ Never leave the press unattended during operation․
Keep children and pets away from the heat press at all times․ Avoid touching the hot platen or attachments – allow them to cool completely before handling․ Use caution when opening the swing-away platen, as escaping heat and steam can cause burns․
Disconnect the power cord when not in use or performing maintenance․ Never attempt to repair the machine yourself; contact qualified personnel for assistance․ Always use Teflon sheets to prevent materials from sticking and potential hazards․ Adhering to these guidelines will ensure a safe and enjoyable heat pressing experience․
Setting Up Your Topdeep Heat Press
Unboxing and Inspection: Carefully unpack your Topdeep heat press and verify all components are present – the main unit, attachments (hat press, mug presses, plate presses, tumbler press), and accessories․ Inspect for any shipping damage․
Attachment Installation: Securely attach the desired press element to the main unit․ Ensure a snug fit; most attachments simply slide or screw into place․ Refer to the diagrams in this manual for proper installation․ Do not force attachments, as this could cause damage․
Workspace Preparation: Position the heat press on a stable, heat-resistant surface with ample space around it for operation and ventilation․ Ensure the power outlet is easily accessible and properly grounded․ Avoid placing the press near flammable materials․ Double-check all connections before proceeding․
Powering On and Initial Calibration
Initial Power-Up: Connect the heat press to a grounded power outlet․ Turn on the power switch, typically located on the side or back of the machine․ The digital control panel will illuminate, displaying the current temperature settings․
Temperature Calibration: For accurate results, calibrate the temperature․ Allow the press to heat up to a known temperature (e․g․, 350°F/177°C)․ Use a separate, calibrated thermometer to verify the actual temperature․ If there’s a discrepancy, adjust the temperature setting on the control panel until it matches the thermometer reading․
Time Calibration: Similarly, verify the timer’s accuracy․ Set the timer for a specific duration and compare it to a stopwatch․ Adjust the timer settings if needed․ Accurate calibration is crucial for consistent transfer quality․ Repeat the calibration process periodically to maintain precision․
Temperature and Time Settings Guide

Optimal settings vary based on the material and transfer type․ For standard cotton t-shirts with sublimation transfers, a temperature of 380-400°F (193-204°C) for 60-90 seconds is generally recommended․ Polyester requires slightly lower temperatures, around 350-370°F (177-188°C) for 45-60 seconds․
Hat pressing typically requires 330-350°F (166-177°C) for 20-30 seconds․ Mug pressing demands 360-380°F (182-193°C) for 120-180 seconds, depending on the mug type (6oz or 11oz)․ Latte mugs (12oz/17oz) may need adjustments, around 350-370°F (177-188°C) for 150-200 seconds․
Plate pressing usually falls between 360-380°F (182-193°C) for 60-80 seconds․ Always test on a scrap piece of material first to fine-tune settings․ Refer to transfer paper instructions for specific recommendations․ Lower temperatures and times are generally safer for delicate fabrics․
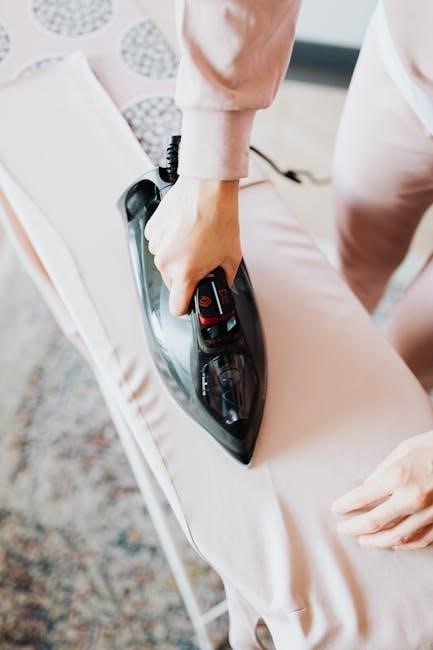
Using the 15×15″ T-Shirt Heat Press
The 15×15″ platen is ideal for standard t-shirt designs․ First, pre-press the garment for 5-10 seconds to remove wrinkles and moisture․ Position your transfer paper, image-side down, onto the fabric․ Ensure proper alignment before closing the heat press․
Swing the press closed, applying firm, even pressure․ Refer to the ‘Temperature and Time Settings Guide’ for appropriate settings based on your fabric and transfer type․ Typically, 380-400°F (193-204°C) for 60-90 seconds works well for cotton․
Once the timer beeps, carefully open the press․ Allow the transfer to cool slightly before peeling the backing paper․ Hot peel or cold peel depends on the transfer paper used – consult the manufacturer’s instructions․ Inspect the transfer for proper adhesion․ Repeat for additional shirts, adjusting settings as needed․
Applying Transfers to T-Shirts: Step-by-Step
Step 1: Preparation – Preheat the 15×15” heat press and prepare your t-shirt by removing any wrinkles․ Step 2: Placement – Position the transfer paper, image-side down, onto the desired location on the t-shirt․ Use heat-resistant tape to secure it if necessary․
Step 3: Pressing – Close the heat press, applying firm, even pressure․ Set the temperature and time according to your transfer paper’s instructions (typically 380-400°F for 60-90 seconds)․ Step 4: Cooling & Peeling – Once the timer sounds, open the press and allow the transfer to cool slightly․
Step 5: Reveal – Carefully peel away the backing paper․ Whether to hot peel or cold peel depends on the transfer type․ Step 6: Inspection – Check for full adhesion․ If needed, cover with parchment paper and repress for a few seconds․ Repeat for subsequent shirts, ensuring consistent results․
Using the 5․5×3″ Hat Press Attachment
Attachment Installation – Securely attach the 5․5×3” hat press to the Topdeep heat press․ Ensure it clicks firmly into place․ Hat Preparation – Place the hat on the press, adjusting the curvature to match the hat’s shape․ Use heat-resistant tape to hold the transfer in position, preventing shifting during pressing․
Temperature & Time – Set the heat press to approximately 315-335°F (157-168°C) for 45-60 seconds․ Adjust based on the transfer material․ Pressing Procedure – Close the heat press, applying even pressure․ The curved platen ensures consistent contact with the hat’s surface․
Cooling & Removal – After the timer, open the press and allow the hat to cool slightly before removing it․ Carefully peel away the transfer paper․ Inspect for complete adhesion and repeat for additional hats, maintaining consistent settings for optimal results․
Mastering Mug Pressing (6oz & 11oz)
Attachment Selection – Choose the appropriate mug attachment (6oz or 11oz) for your mug size and securely attach it to the heat press․ Mug Preparation – Thoroughly clean and dry the mug surface․ Apply your sublimation design using heat-resistant tape to maintain precise positioning during the transfer process․
Temperature & Time – Set the temperature to around 360-380°F (182-193°C) and the timer for 60-120 seconds․ These settings may vary based on the mug coating and transfer paper․ Pressing Procedure – Gently insert the mug into the attachment, ensuring full contact with the heating element․ Close the press firmly․
Cooling & Removal – Once the timer completes, carefully remove the mug (it will be hot!)․ Allow it to cool before removing the tape and transfer paper․ Inspect the finished product for a vibrant, fully adhered design․
Utilizing the 12oz & 17oz Latte Mug Presses
Attachment Application – Securely attach the cone-shaped 12oz or 17oz latte mug press to the Topdeep heat press․ These attachments are specifically designed for the tapered shape of latte mugs․ Design Preparation – Ensure your sublimation design is appropriately sized for the mug’s surface area․ Use heat-resistant tape to firmly affix the design, preventing shifting during pressing․
Optimal Settings – Set the temperature between 350-370°F (177-188°C) and the timer for 120-180 seconds․ Adjust based on your specific transfer paper and mug coating․ Pressing Technique – Carefully position the latte mug onto the attachment, ensuring even contact with the heating element․ Close the press with consistent pressure․
Post-Press Procedure – After the timer signals completion, cautiously remove the mug․ Allow it to cool completely before removing the tape and transfer paper, revealing your customized latte mug!
Plate Pressing: 5″ and 6″ Plates Explained
Attachment Swap – Interchange the standard platen with either the 5” or 6” plate press attachment, depending on your desired plate size․ Ensure a secure connection before proceeding․ Design Considerations – Mirror your design before printing onto sublimation paper, as it will transfer in reverse․ Trim the paper to fit slightly smaller than the plate’s surface area․
Temperature & Time – Set the heat press to 380-400°F (193-204°C) with a pressing time of 60-90 seconds․ These settings may vary based on the plate material and coating․ Pressing Process – Place the plate onto the sublimation paper, then cover with a sheet of protective paper to prevent ink smudging․ Close the press, applying firm, even pressure․
Cooling & Removal – Once the timer ends, carefully remove the plate․ Allow it to cool completely before peeling off the sublimation paper, revealing your beautifully customized plate!
Tumbler Attachment – Begin by securely attaching the 30oz tumbler press to your Topdeep heat press machine․ Ensure it’s firmly locked in place for safe and consistent operation․ Design Preparation – Create your design, remembering to mirror it before printing onto sublimation paper․ Accurate sizing is crucial for a seamless wrap around the tumbler․
Wrapping the Tumbler – Carefully wrap the printed sublimation paper tightly around the 30oz tumbler, ensuring complete coverage․ Secure the paper with heat-resistant tape to prevent shifting during the pressing process․ Temperature & Time – Set the heat press to 380-400°F (193-204°C) and a pressing time of 60-90 seconds․ Adjust based on your specific tumbler and paper․
Pressing & Cooling – Gently place the wrapped tumbler into the press, close it, and apply even pressure․ After the timer, remove the tumbler and allow it to cool completely before removing the paper, revealing your customized design!
Troubleshooting Common Issues
Uneven Heating: If experiencing uneven heat distribution, verify the pressure is evenly applied․ Check for obstructions hindering full platen contact․ Recalibrate the machine following the initial calibration steps․ Transfer Issues: Faded or incomplete transfers often stem from insufficient temperature, pressure, or time․ Double-check settings and ensure quality sublimation paper and ink are used․
Error Codes: Refer to the ‘Error Codes and Their Meanings’ section for specific code resolutions․ Common errors relate to temperature sensor malfunctions or heating element failures․ Machine Won’t Power On: Inspect the power cord and outlet․ Check the fuse and replace if necessary․ If the issue persists, contact customer support․
Paper Slipping: Secure sublimation paper firmly with heat-resistant tape․ Ensure the surface is clean and free of debris․ Consistent Issues: If problems persist, consult the ‘Where to Find Additional Support and Resources’ section for expert assistance․
Error Codes and Their Meanings
E1: Temperature Sensor Error – Indicates a faulty temperature sensor․ Power cycle the machine․ If the error persists, contact support for sensor replacement․ E2: Heating Element Failure – Signals a problem with the heating element․ Do not attempt self-repair; professional servicing is required․ E3: Time Error – Suggests an issue with the timer circuit․ Reset the machine and verify time settings․
E4: Communication Error – Points to a problem with internal communication between components․ Power off, wait 5 minutes, and power back on․ E5: Overheating Protection – The machine has automatically shut down to prevent damage․ Allow it to cool completely before restarting․ Check for ventilation obstructions․
E6: Low Voltage – Indicates insufficient power supply․ Ensure a stable power source․ E7: Platen Control Error – A problem with the platen’s movement․ Inspect for physical obstructions․ Note: These codes are indicative․ Always consult Topdeep support for definitive diagnosis and repair guidance․

Cleaning and Maintenance Procedures

Regular cleaning is crucial for optimal performance and longevity of your Topdeep heat press․ After each use, allow the machine to cool completely․ Gently wipe down the platen with a soft, damp cloth to remove any residue from transfers․ Avoid abrasive cleaners, as they can damage the surface․
Weekly maintenance includes inspecting the heating elements for any signs of damage or wear․ Check the pressure adjustment knob for smooth operation․ Clean the attachments (hat press, mug presses, plates) separately with appropriate cleaning solutions․ Monthly, inspect the power cord for fraying or damage․
Avoid getting water inside the machine’s electrical components․ Never use compressed air to clean the interior․ Proper maintenance ensures consistent heat distribution and prevents premature failure․ Refer to the warranty information for authorized service centers․
Topdeep Heat Press Accessories
Enhance your Topdeep heat press’s capabilities with a range of available accessories․ Essential additions include high-quality Teflon sheets, protecting both your materials and the platen from sticking and scorching․ Heat-resistant gloves are vital for safe handling of hot items and the press itself․
For specialized projects, consider purchasing extra mug wraps in various sizes to accommodate different mug types․ Silicone mats provide a heat-resistant surface for placing finished products․ Transfer tape is crucial for securely adhering designs to fabrics before pressing․ Topdeep also offers replacement heating elements and thermostats․
Explore options like multi-color heat press paper for vibrant designs and pressure adjustment tools for precise control․ Investing in quality accessories maximizes your creative potential and ensures professional results․ Always verify compatibility with your specific Topdeep model․
Where to Find Additional Support and Resources
For comprehensive support, begin with the official Topdeep website․ It features a dedicated FAQ section addressing common issues and troubleshooting tips․ You’ll also find downloadable resources, including updated manuals and software drivers if applicable․ Amazon product pages often host a Q&A section where users share experiences and solutions․
YouTube is a valuable resource, offering numerous tutorial videos demonstrating various techniques and addressing specific problems․ Search for “Topdeep heat press tutorial” to access a wealth of visual guidance․ Online crafting communities and forums, like Reddit’s r/heatpress, provide platforms for asking questions and connecting with fellow users․
Topdeep’s customer service team is available via email or phone, offering direct assistance with technical issues or warranty claims․ Keep your purchase information readily available when contacting support․ Remember to consult these resources for optimal performance and a seamless heat pressing experience․
Warranty Information and Registration
Topdeep heat presses are backed by a manufacturer’s warranty, protecting against defects in materials and workmanship․ The standard warranty period is typically one year from the date of purchase, though specific terms may vary depending on the model and retailer․ Warranty coverage includes repair or replacement of defective parts, at Topdeep’s discretion․
To activate your warranty, it’s crucial to register your product promptly․ Visit the official Topdeep website and locate the warranty registration page․ You’ll need your purchase date, model number, and proof of purchase (receipt or invoice)․ Failure to register may invalidate your warranty claims․
The warranty does not cover damage resulting from misuse, improper maintenance, or unauthorized modifications․ Carefully review the warranty terms and conditions for a complete understanding of coverage limitations․ Keep your registration confirmation and proof of purchase in a safe place for future reference․