
Cen-Tech DMMs are versatile tools for electrical testing, offering features like voltage, current, and resistance measurements.
Understanding CEN standards ensures safe and compliant usage, as highlighted in electrical product compliance guidelines.
What is a Digital Multimeter (DMM)?
A Digital Multimeter (DMM) is an essential electronic measuring instrument used by professionals and hobbyists alike. Unlike older analog meters, DMMs display readings numerically on an LCD screen, providing greater precision and ease of reading. They measure various electrical parameters, including voltage (AC & DC), current (AC & DC), and resistance.
Furthermore, many DMMs, like those from Cen-Tech, offer advanced functions such as continuity testing, diode testing, and capacitance measurement. Understanding these functions, and adhering to CEN electrical safety standards, is crucial for accurate and safe operation. They are vital for troubleshooting electrical circuits and verifying component functionality.
Cen-Tech DMM Models: An Overview
Cen-Tech offers a range of Digital Multimeters catering to diverse needs and budgets. Models vary in features, accuracy, and input protection. Basic models typically measure voltage, current, and resistance, suitable for general household electrical work. More advanced models include features like auto-ranging, diode testing, and capacitance measurement.
Considering CEN standards, all Cen-Tech DMMs should meet relevant electrical safety requirements. It’s important to check the specific model’s specifications for its capabilities and limitations. Understanding these differences ensures you select the appropriate tool for the task at hand, maximizing both safety and accuracy.

Understanding the DMM Display
LCD displays show measured values and units. Familiarize yourself with symbols for voltage, current, resistance, and other functions for accurate readings and safe operation.
LCD Display Components
The Cen-Tech DMM’s LCD screen is comprised of several key elements crucial for interpreting measurements. These include the primary display area, showing the numerical value, and the unit designation (V, A, Ω, etc.). Additional indicators signal important conditions like overload, low battery, or data hold.
Symbols denote AC or DC voltage/current. A continuity symbol, often a diode icon, indicates a complete circuit. Polarity indicators (+ or -) show the direction of current flow. Understanding each component ensures accurate interpretation of readings and safe, effective use of the multimeter.
Reading Values on the Display
Interpreting the Cen-Tech DMM’s LCD requires attention to both the numerical value and the unit displayed. Pay close attention to the decimal point’s position, indicating magnitude (e.g., mV, kΩ). Note any prefixes like ‘M’ (mega) or ‘µ’ (micro) which alter the base unit.
Observe indicator symbols; ‘OL’ signifies an overload condition, meaning the measured value exceeds the selected range. A low battery indicator prompts replacement. Accurate readings depend on correctly identifying the unit and recognizing any warning symbols displayed alongside the numerical value.

Basic Measurement Functions
Cen-Tech DMMs excel at measuring voltage (AC/DC), current (AC/DC), and resistance. These core functions are essential for diagnosing electrical circuits and components effectively.
Voltage Measurement (DC & AC)
Measuring voltage with your Cen-Tech DMM requires selecting the appropriate voltage range and mode (DC or AC). DC voltage is measured for batteries and direct current circuits, while AC voltage is for household outlets.
Insert the black test lead into the COM port and the red lead into the VΩ port. Connect the leads in parallel with the circuit or component you’re testing – meaning across the points where you want to measure the voltage drop.
Ensure the DMM is set to the correct voltage type (DC or AC) and a range higher than the expected voltage. If the reading is low, decrease the range for better precision. Always prioritize safety when working with electricity!
Current Measurement (DC & AC)
Measuring current with a Cen-Tech DMM demands careful setup, as it’s measured in series with the circuit. This means you must break the circuit and insert the meter into the current path.
Move the red test lead to the A (Amps) port. Select the appropriate current range (DC or AC) and a range higher than the expected current. Caution: Excessive current can blow the DMM’s fuse!
Never connect the DMM directly across a voltage source when in current mode. Always start with the highest current range and work downwards. Disconnect power before making connections and re-apply after the meter is in place.
Resistance Measurement
Measuring resistance with your Cen-Tech DMM is straightforward, but crucial preparation is needed. Ensure the circuit is completely de-energized – remove power sources to prevent damage to the meter and ensure accurate readings.
Insert the test leads into the appropriate ports (usually COM and Ohms – Ω). Select the resistance range, starting with the highest setting and decreasing as needed for better precision.
Touch the probes to the component or circuit points you wish to measure. Note that body resistance can affect low-resistance measurements, so avoid touching the metal probe tips directly.
Advanced Measurement Functions
Cen-Tech DMMs offer features beyond basic readings, including continuity testing, diode checks, and capacitance measurement, expanding diagnostic capabilities for complex circuits.
Continuity Testing
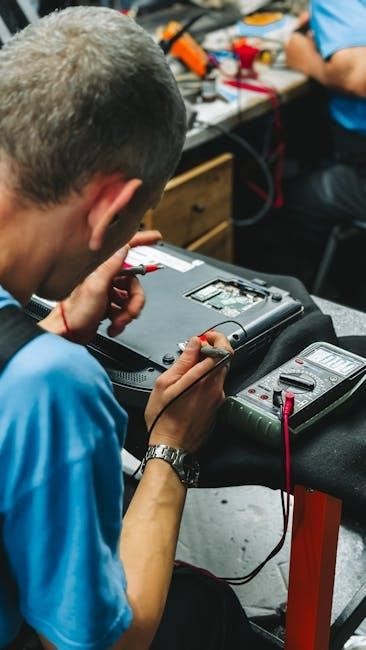
Continuity testing with your Cen-Tech DMM verifies an unbroken electrical path. Select the continuity mode (often symbolized by a diode or sound wave). Connect the test leads to the circuit points you wish to test. If a complete circuit exists, the DMM will emit an audible beep and/or display a low resistance value, typically near zero ohms.
A lack of beep or a high resistance reading indicates an open circuit – a break in the connection. This function is invaluable for identifying broken wires, faulty switches, or poor connections. Always ensure the circuit is de-energized before performing continuity tests to prevent damage to the meter or personal injury.
Diode Testing
Diode testing on your Cen-Tech DMM checks the functionality of diodes and other semiconductor devices. Select the diode test mode (often indicated by a diode symbol). Connect the red lead to the anode (positive side) and the black lead to the cathode (negative side) of the diode. A healthy diode will display a forward voltage drop, typically between 0.5V and 0.8V.
Reversing the leads should show “OL” or a very high resistance, indicating reverse blocking. If the diode shows “OL” in both directions, it’s likely open or faulty. A reading of 0V in both directions suggests a shorted diode. Always disconnect power before testing diodes in a circuit.
Capacitance Measurement
Capacitance measurement with your Cen-Tech DMM determines the ability of a capacitor to store an electrical charge. Select the capacitance mode (usually marked with a ‘F’ symbol). Important: Discharge the capacitor completely before testing to avoid damaging the meter or causing inaccurate readings. Connect the test leads to the capacitor’s terminals – polarity generally doesn’t matter for non-polarized capacitors.
The DMM will display the capacitance value in Farads (F), microfarads (µF), or picofarads (pF). Note that larger capacitors may take longer to charge and stabilize the reading. Always refer to the capacitor’s datasheet for expected values.
Using the Cen-Tech DMM – Step-by-Step
Proper usage involves selecting the correct range, securely connecting test leads, and ensuring a stable reading for accurate measurements, prioritizing electrical safety at all times.
Setting the Range
Proper range selection is crucial for accurate readings with your Cen-Tech DMM. Begin by identifying the expected value of the quantity you intend to measure – voltage, current, or resistance. If the value is unknown, start with the highest range setting and gradually decrease it until a stable and precise reading is obtained.
Auto-ranging models simplify this process, automatically selecting the appropriate range. However, for manual ranging, exceeding the selected range will result in an overload indication. Conversely, a range that is too low may provide a reading that is difficult to interpret or lacks sufficient resolution. Always consult the instruction manual for specific range limitations of your Cen-Tech DMM model.
Connecting Test Leads
Correct test lead connection is fundamental for safe and accurate measurements. The black lead always connects to the “COM” (common) terminal. The red lead connects to the appropriate terminal based on the measurement type: “VΩmA” for voltage, resistance, and low current, or “10A” for higher current measurements (use with caution!).
Ensure leads are firmly inserted into both the DMM and the circuit being tested. Poor connections can lead to inaccurate readings or even pose a safety hazard. Always inspect the leads for damage before use, replacing any frayed or broken wires. Remember to disconnect leads before changing measurement functions.
Taking Accurate Measurements
Achieving precise readings requires careful technique. Ensure the circuit is properly isolated and de-energized when connecting test leads, especially for voltage measurements. Select the appropriate range on the DMM – auto-ranging simplifies this, but manual selection offers greater control.
Hold the leads steady and avoid introducing additional resistance into the circuit with your fingers. Observe the display and note the units of measurement. Consider environmental factors; temperature can affect resistance readings. Repeat measurements several times to confirm consistency and minimize errors.
Safety Precautions
Prioritize safety! Always disconnect power before testing circuits, avoid touching exposed conductors, and understand CEN electrical safety standards for reliable operation.
General Safety Guidelines
Always inspect test leads for damage before each use, replacing any frayed or cracked components immediately. Never exceed the multimeter’s specified input limits, as this can damage the instrument and pose a safety hazard. Work in a dry environment to minimize the risk of electrical shock.
Be aware of your surroundings and avoid distractions while taking measurements. Disconnect power to the circuit under test whenever possible before connecting or disconnecting test leads. Familiarize yourself with relevant CEN electrical safety standards to ensure compliance and safe working practices. Remember, safety is paramount when working with electricity.
Avoiding Electrical Shock
Prioritize disconnecting power sources before making any measurements; this is the most effective safety measure. Never work alone when dealing with potentially hazardous voltages. Ensure your hands and the multimeter are dry to prevent becoming a conductive path.
Use insulated tools and wear appropriate personal protective equipment (PPE), like safety glasses. Be mindful of exposed metal parts and avoid touching them during measurements. Understanding CEN standards related to electrical safety is crucial for preventing accidents and ensuring a safe working environment. Always respect the power of electricity.
Troubleshooting Common Issues
Addressing problems like “no display” or incorrect readings requires checking the battery, fuses, and test lead connections for proper functionality and safety.
No Display
If the Cen-Tech DMM screen remains blank, begin by verifying the battery’s condition. A depleted or incorrectly installed battery is a frequent cause. Ensure proper polarity when replacing it. Next, inspect the internal fuse – a blown fuse indicates a potential overload or internal fault requiring professional attention.
Also, confirm the rotary switch isn’t positioned on the ‘OFF’ setting. Sometimes, a poor connection with the test leads can also prevent a display. Try different leads or ensure firm contact within the jacks. If these steps fail, the unit may require servicing.
Incorrect Readings
When encountering inaccurate measurements with your Cen-Tech DMM, first double-check the selected range. An inappropriate range setting is a common source of error. Verify the test leads are securely connected to the correct terminals and the component being tested.
Consider potential interference from nearby electromagnetic fields, which can influence readings. Ensure the DMM is calibrated correctly; if issues persist, recalibration may be necessary. Also, confirm you’re interpreting the display units (Volts, Amps, Ohms) accurately for the measurement type.
Overload Indication
An “OL” or similar display message on your Cen-Tech DMM signifies an overload condition. This means the selected range is insufficient for the value being measured. Immediately switch to a higher range setting to protect the meter from damage.
Do not attempt to measure values exceeding the DMM’s maximum specified limits. Overloads can occur when measuring high voltages, currents, or resistances. Ensure proper test lead connections and that the component under test isn’t supplying excessive energy. Repeated overloads may indicate a potential meter fault.

Battery Information & Replacement
Cen-Tech DMMs typically use a 9V battery. Low battery power is indicated on the display; replace it promptly to ensure accurate measurements and reliable operation.
Battery Type
Cen-Tech digital multimeters are generally powered by a standard 9-volt battery. While some older models might utilize alternative battery types, the vast majority require this common size. It’s crucial to use a fresh, high-quality 9V battery for optimal performance and accurate readings. Avoid using rechargeable batteries unless specifically indicated as compatible in your DMM’s documentation, as voltage discrepancies can affect measurement precision. Always dispose of used batteries responsibly, following local environmental regulations. Confirm the correct battery type by checking the battery compartment or the original instruction manual.
Replacing the Battery
To replace the battery, locate the battery compartment, typically on the back of the Cen-Tech DMM. You may need a small screwdriver to open the compartment cover. Carefully remove the old 9-volt battery and note the polarity (+ and -) markings inside the compartment. Insert a new 9-volt battery, ensuring correct alignment with the polarity indicators. Replace the compartment cover and secure it with the screw. A low battery is often indicated by a battery symbol on the LCD display. Always disconnect test leads before battery replacement for safety.
Cen-Tech DMM Specifications
Cen-Tech DMMs boast varying input impedance and accuracy levels, crucial for precise measurements. Refer to your specific model’s datasheet for detailed technical specifications.
Input Impedance
Input impedance is a critical specification for any digital multimeter, including Cen-Tech models. It represents the resistance the DMM presents to the circuit being tested. Higher input impedance is generally preferred, especially when measuring voltage in high-resistance circuits. A high impedance minimizes loading effects, ensuring a more accurate voltage reading by drawing less current from the circuit. Cen-Tech DMMs typically offer input impedances in the megaohm range (e.g., 10 MΩ), suitable for most general-purpose electrical measurements. Lower impedance values can distort readings in sensitive circuits. Always consult your specific model’s manual for the exact input impedance value.
Accuracy Specifications
Accuracy specifications define how closely a Cen-Tech DMM’s reading matches the actual value of the measured quantity. These are typically expressed as a percentage of the reading plus a number of digits. For example, ±(0.5% + 2 digits) means the reading could be off by 0.5% of the measured value, plus two counts of the least significant digit. Accuracy varies depending on the measurement range and function (voltage, current, resistance). Always refer to the specific accuracy table in your DMM’s instruction manual for detailed information regarding each measurement range and function.
Cen-Tech DMM vs. Other Brands
Cen-Tech DMMs offer a budget-friendly option, often comparing favorably in features to other brands, though potentially differing in long-term durability and precision.
Comparing Features
Cen-Tech digital multimeters generally provide core functionalities – voltage, current, and resistance – comparable to more expensive brands. However, advanced features like auto-ranging, capacitance measurement, and frequency counting might be limited or absent in entry-level Cen-Tech models. Higher-end Cen-Tech DMMs attempt to bridge this gap, incorporating features found in Fluke or Klein Tools, but often at a reduced accuracy specification. Build quality and display clarity are also areas where premium brands frequently outperform Cen-Tech, impacting long-term usability and readability in challenging conditions. Considering specific needs is crucial when comparing features.
Price Comparison
Cen-Tech digital multimeters are notably more affordable than established brands like Fluke or Klein Tools. Basic Cen-Tech models can be found for under $30, offering a budget-friendly entry point for hobbyists and DIYers. Mid-range options typically range from $50 to $100, while more feature-rich models may reach $150. In contrast, professional-grade multimeters from leading brands often start around $150 and can exceed $500. This significant price difference reflects variations in accuracy, durability, and included features, making Cen-Tech a compelling option for cost-conscious users.

Understanding CEN Standards (Related to Electrical Safety)
CEN standards serve as national standard templates for member states, ensuring electrical product compliance and safety across 34 CENELEC member countries.
CEN and Electrical Product Compliance
CEN (European Committee for Standardization) plays a crucial role in establishing harmonized standards for electrical products, including devices like the Cen-Tech Digital Multimeter. These standards aren’t legally binding themselves, but they are foundational for demonstrating compliance with broader European Union directives.
By adhering to CEN standards, manufacturers like those producing Cen-Tech DMMs demonstrate a commitment to safety, performance, and interoperability. This compliance simplifies market access within Europe and builds consumer trust. CEN works with CENELEC and ETSI, guided by the EU Commission, to create these vital regulations.
CENELEC Standards
CENELEC, the European Committee for Electrotechnical Standardization, develops standards specifically for the electrical, electronic, and electromagnetic fields. These standards are directly relevant to the Cen-Tech Digital Multimeter, ensuring its safe operation and reliable performance.
CENELEC standards often underpin EU directives, meaning compliance with these standards is frequently a legal requirement for selling electrical products within Europe. They cover aspects like safety testing, electromagnetic compatibility (EMC), and product marking. CEN, CENELEC, and ETSI collaborate to create a cohesive framework for product compliance, guided by EU regulations.
Resources and Further Information
Cen-Tech support and online tutorials offer valuable assistance. Explore guides for enhanced understanding and troubleshooting, ensuring optimal use of your digital multimeter.
Cen-Tech Support
Cen-Tech provides customer support primarily through Harbor Freight Tools, the retailer of these multimeters. Direct contact options include their customer service phone line and online help center, accessible via the Harbor Freight website. While dedicated Cen-Tech-specific technical documentation can be limited, the Harbor Freight site often features FAQs and basic troubleshooting guides.
Users frequently find assistance through online forums and communities dedicated to electronics and DIY projects, where shared experiences and solutions regarding Cen-Tech DMMs are readily available. Searching online for specific model numbers alongside keywords like “troubleshooting” or “repair” can yield helpful results from fellow users.
Online Tutorials and Guides
Numerous online resources supplement the Cen-Tech digital multimeter instruction manual. YouTube hosts a wealth of video tutorials demonstrating basic usage, advanced functions, and troubleshooting techniques for various Cen-Tech models. Websites specializing in electronics repair and DIY projects often feature step-by-step guides and articles covering common issues and measurements.
Dedicated electronics forums and communities provide platforms for users to share knowledge, ask questions, and find solutions related to Cen-Tech DMMs. Searching for specific model numbers alongside terms like “tutorial” or “guide” will quickly surface relevant content.