Signalink USB Manual: A Comprehensive Guide
This manual provides detailed instructions for the Tigertronics SignaLink USB interface‚ ensuring optimal performance with compatible radios and software applications.
Welcome to the world of digital amateur radio communication! The Signalink USB is a versatile interface designed to connect your transceiver to your computer‚ enabling a wide range of digital modes. This interface facilitates clear and reliable communication‚ enhancing your ham radio experience. It’s crucial to understand that the SignaLink USB requires a radio-specific interface cable for proper operation‚ and detailed information regarding these cables‚ transceiver menu settings‚ and internal jumper charts can be found in the documentation available on the Tigertronics website.
This manual will guide you through the setup‚ configuration‚ and troubleshooting of your Signalink USB. Whether you’re a seasoned digital operator or just starting‚ this guide will provide the necessary knowledge to unlock the full potential of your equipment. Remember to consult the documentation for specific details related to your radio model.
What is the Signalink USB?
The Signalink USB is a sophisticated digital communication interface designed for amateur radio enthusiasts. It acts as a bridge between your radio transceiver and your computer‚ allowing you to utilize various digital modes such as FT8‚ PSK31‚ RTTY‚ and more. This interface features isolated audio‚ crucial for minimizing noise and ensuring clean signal transmission and reception.
Essentially‚ it converts audio and data signals between your radio and computer‚ enabling digital communication. It connects via a standard USB port – USB 1.1‚ 2.0‚ or 3.0 – utilizing the supplied USB cable‚ with USB 2.0 often preferred for optimal performance. The SignaLink USB isn’t a standalone device; it requires a compatible interface cable specific to your radio model for seamless integration.
Key Features and Benefits
The Signalink USB boasts several key features that enhance your digital communication experience. Its isolated audio capability is paramount‚ effectively eliminating ground loops and reducing unwanted noise for clearer signals. Compatibility with a wide range of software programs‚ including popular digital mode applications‚ provides versatility.
Furthermore‚ the interface supports connection to standard USB 1.1‚ 2.0‚ or 3.0 ports‚ offering broad computer compatibility. Utilizing a radio-specific interface cable ensures a secure and optimized connection to your transceiver. The availability of Plug-N-Play modules simplifies setup for certain radio models. Ultimately‚ the Signalink USB delivers reliable performance‚ enabling seamless digital operation and improved communication quality for radio amateurs.
Setting Up Your Signalink USB
Proper setup is crucial for optimal performance; this section details unboxing‚ system requirements‚ driver installation‚ and connecting the interface to your computer effectively.
Unboxing and Package Contents
Upon receiving your Signalink USB‚ carefully inspect the packaging for any signs of damage during shipment. A damaged package may indicate potential issues with the interface itself. Once you’ve confirmed the package is in good condition‚ open it to verify all components are present.
The standard Signalink USB package should include: the Signalink USB interface unit‚ a USB cable (typically a standard USB 2.0 or 3.0 cable)‚ and a quick start guide. Crucially‚ the interface cable specific to your radio model is not included and must be purchased separately.
Refer to the Tigertronics website or documentation for a comprehensive list of compatible interface cables for your specific transceiver. Missing the correct interface cable will prevent connection to your radio. Retain the original packaging for potential warranty claims or future transport of the device.
System Requirements
To ensure seamless operation of your Signalink USB‚ your computer system must meet certain minimum requirements. The interface is broadly compatible‚ but optimal performance relies on adhering to these guidelines.
Operating System: Windows 7 or later (32-bit or 64-bit) is recommended. Compatibility with macOS and Linux may be limited and requires advanced configuration. Processor: A Pentium 4 or equivalent processor is sufficient for most digital modes. Memory: A minimum of 2GB of RAM is suggested‚ though 4GB or more is preferable for running multiple applications simultaneously.
USB Port: The Signalink USB can connect to USB 1.1‚ USB 2.0‚ or USB 3.0 ports. While USB 3.0 offers faster data transfer speeds‚ USB 2.0 ports are often preferred for stability. Ensure you have an available USB port for connection. A stable power supply is also crucial for reliable operation.
Driver Installation
Proper driver installation is essential for the Signalink USB to function correctly with your computer. Typically‚ Windows will automatically detect the device and attempt to install a driver. However‚ for optimal performance and full functionality‚ it’s recommended to download and install the latest driver from the Tigertronics website.
Download the driver package specifically designed for your operating system (Windows 32-bit or 64-bit). Extract the contents of the downloaded archive. Run the setup executable and follow the on-screen instructions. During installation‚ you may be prompted to restart your computer. Allow the process to complete fully before connecting the Signalink USB.

Verify the installation by checking Device Manager. The Signalink USB should appear under “Ports (COM & LPT)” or a similar category‚ without any error indicators. If issues arise‚ consult the troubleshooting section of this manual.
Connecting to Your Computer
Establishing a reliable connection between the Signalink USB and your computer is crucial for seamless operation. The interface is compatible with standard USB 1.1‚ USB 2.0‚ and USB 3.0 ports. While USB 3.0 offers faster data transfer speeds‚ USB 2.0 ports are often preferred for their stability and compatibility with various systems.
Utilize the supplied USB cable to connect the Signalink USB to an available USB port on your computer. On desktop computers‚ connecting directly to a rear panel USB port is generally recommended for a more secure and stable connection. Avoid using USB hubs or extension cables whenever possible‚ as they can introduce signal degradation.
Ensure the connection is firm and secure; Once connected‚ your computer should recognize the Signalink USB as a new device‚ initiating the driver installation process if it hasn’t already been completed.
USB Port Considerations (USB 2.0 vs. USB 3.0)
Choosing the appropriate USB port can impact the Signalink USB’s performance. While both USB 2.0 and USB 3.0 are compatible‚ understanding their differences is beneficial. USB 3.0 boasts significantly faster data transfer rates‚ potentially improving performance with demanding digital modes or high data throughput applications.
However‚ USB 2.0 often provides greater stability and broader compatibility‚ particularly with older systems or certain radio models. If you experience issues with USB 3.0‚ such as intermittent connectivity or audio glitches‚ switching to a USB 2.0 port is a recommended troubleshooting step.
The supplied USB cable is designed to work optimally with both standards. Experimenting with both port types can help determine which yields the most reliable performance in your specific setup. Prioritize a stable connection over maximizing transfer speed.
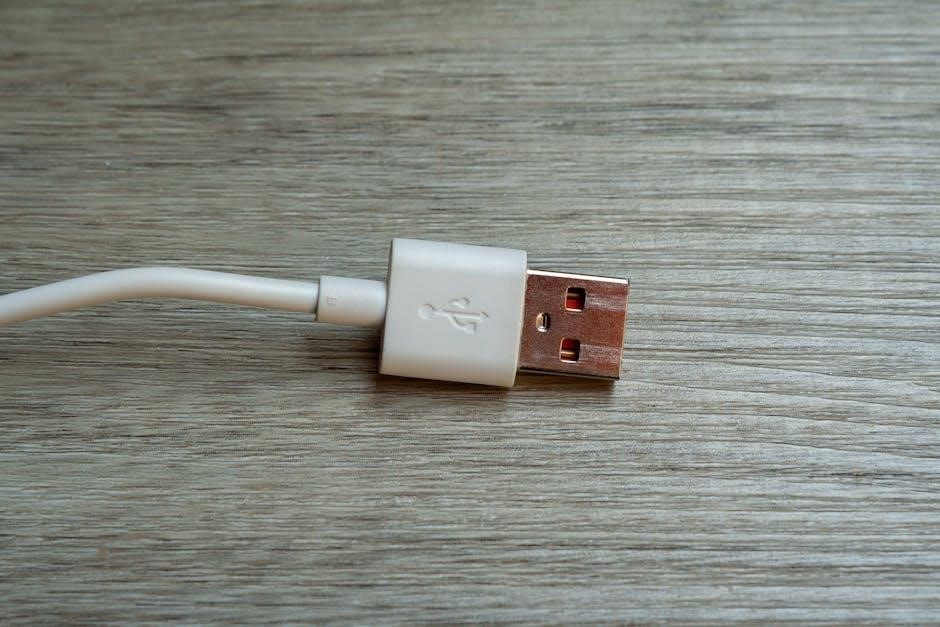
Using the Supplied USB Cable
The Signalink USB includes a high-quality USB cable specifically designed for reliable data and power delivery. Ensure a secure connection at both the interface and your computer. Avoid using extension cables or adapters whenever possible‚ as they can introduce signal degradation and instability.
For desktop computers‚ direct connection to a rear USB port on the motherboard is generally preferred over front panel ports‚ which may have limited power or increased interference. If using a USB hub‚ ensure it’s powered and of good quality to avoid potential issues.
Inspect the cable regularly for any signs of damage‚ such as fraying or bent connectors. A damaged cable can cause intermittent operation or complete failure. Replacing it with the supplied cable‚ or a comparable high-quality USB cable‚ is recommended if damage is detected.

Connecting to Your Radio
Proper radio connection requires a compatible interface cable and potentially specific menu settings adjustments within your transceiver for seamless digital communication.
Understanding Interface Cables
The SignaLink USB necessitates a radio-specific interface cable for establishing a connection with your transceiver; these cables are not universally compatible. Selecting the correct cable is paramount for proper functionality‚ as it ensures the correct pinout and signal transmission between the interface and your radio.
Tigertronics emphasizes the importance of consulting their documentation – specifically the “Tigertronics Cables” link on the Documentation tab – to identify the appropriate cable for your particular radio model. Incorrect cabling can lead to a lack of communication‚ audio issues‚ or even potential damage to your equipment.
Beyond standard cables‚ Tigertronics also offers “Plug-N-Play Modules” which simplify the connection process for certain radios‚ eliminating the need for internal jumper adjustments. Carefully review your radio’s requirements and the available options to ensure a successful setup. Always prioritize using the recommended cable for optimal performance and reliability.
Radio-Specific Menu Settings
Many radios require specific menu adjustments to correctly interface with the SignaLink USB for digital mode operation. These settings often involve disabling the radio’s internal sound card‚ configuring the data port (CAT control)‚ and adjusting the PTT (Push-To-Talk) delay.
Tigertronics strongly advises referencing the detailed documentation available on their website‚ specifically the “Tigertronics Cables” link within the Documentation tab. This resource provides crucial information regarding the necessary menu configurations for a wide range of transceiver models.
Failing to adjust these settings appropriately can result in issues such as no audio transmission‚ incorrect PTT activation‚ or unreliable data communication. Carefully follow the instructions provided for your specific radio to ensure seamless integration and optimal performance with the SignaLink USB interface.
Internal Jumper Charts
The SignaLink USB incorporates internal jumper settings to accommodate various radio configurations and operational requirements. These jumpers allow users to customize the interface for optimal compatibility with their specific transceiver model and desired digital mode setup.
Detailed jumper charts‚ illustrating the correct jumper positions for different radios‚ are essential for proper functionality. Tigertronics provides these charts within the documentation available on their website‚ accessible through the “Tigertronics Cables” link in the Documentation tab.
Incorrect jumper settings can lead to communication errors‚ audio issues‚ or complete failure of the interface. Always consult the appropriate jumper chart for your radio before making any adjustments. Careful attention to these details ensures reliable and efficient digital communication with your transceiver.
Plug-N-Play Modules
Tigertronics offers Plug-N-Play modules designed to simplify the connection process for specific radio models. These modules eliminate the need for complex wiring or internal jumper adjustments‚ providing a streamlined and user-friendly experience. They are particularly beneficial for users less familiar with radio interfacing techniques.
These pre-configured modules ensure correct pin assignments and signal routing‚ guaranteeing compatibility and optimal performance. Information regarding available Plug-N-Play modules‚ and their corresponding supported radios‚ can be found in the Tigertronics documentation.
Referencing the “Tigertronics Cables” link within the Documentation tab is crucial for determining if a Plug-N-Play module exists for your transceiver. Utilizing these modules significantly reduces setup time and minimizes the risk of connection errors‚ enhancing the overall user experience.

Software Configuration
Proper software setup is essential; configure audio‚ PTT‚ and serial port settings within your chosen program for seamless digital communication with the SignaLink USB.
Compatible Software Programs
The SignaLink USB boasts broad compatibility with a wide array of popular digital mode software packages‚ enhancing its versatility for amateur radio operators. Commonly used programs include WSJT-X‚ a leading choice for weak-signal communication protocols like FT8 and JT65‚ offering robust decoding and encoding capabilities.
Furthermore‚ the interface seamlessly integrates with programs such as FLDIGI‚ providing support for numerous digital modes including RTTY‚ PSK31‚ and FT4. JTDX‚ another excellent option‚ is specifically designed for JT9 and FT8 operation‚ delivering optimized performance. Beyond these‚ compatibility extends to software like Ham Radio Deluxe‚ offering a comprehensive suite of tools for radio control and digital communication.
Users should consult the specific software documentation for detailed configuration instructions related to the SignaLink USB‚ ensuring optimal audio and PTT settings for reliable digital operation. Regular software updates are recommended to maintain compatibility and access the latest features.
Audio Settings Configuration
Proper audio configuration is crucial for optimal digital mode performance with the SignaLink USB. Within your chosen software‚ select the SignaLink USB as both the input and output audio device. Adjust input levels carefully to achieve a strong‚ clean signal without clipping. Monitoring the audio levels is essential; aim for peaks around -12dB to -6dB in your software’s audio meter.
Ensure the software’s audio mode matches the SignaLink USB’s output – typically 9600 baud for most digital modes. Experiment with software-specific audio filters to reduce noise and improve readability.
Pay close attention to the software’s “sound card” or “audio interface” settings‚ selecting the appropriate SignaLink USB device. Incorrect audio settings can result in distorted signals or complete communication failure. Test thoroughly with a known good signal before engaging in critical transmissions.
PTT Settings Configuration
Configuring the PTT (Push-To-Talk) settings correctly is vital for seamless operation of the SignaLink USB. Within your digital mode software‚ designate a specific COM port or virtual serial port associated with the SignaLink USB for PTT control. Ensure the software’s PTT mode is set to “Data” or “Packet‚” not “Voice.”
Adjust the PTT delay settings to prevent “splatter” or incomplete transmissions. A short delay (50-100ms) is generally recommended. Experiment with these values to find the optimal setting for your software and radio combination. Incorrect PTT settings can lead to garbled transmissions or failure to transmit at all.
Verify that the PTT signal is activating your radio’s transmitter reliably. Test with short transmissions and monitor the transmitted signal on a spectrum analyzer if available.
Serial Port Configuration
Proper serial port configuration is crucial for the SignaLink USB to communicate effectively with your computer and radio software. After driver installation‚ the SignaLink USB will appear as a virtual COM port in your operating system’s Device Manager. Identify the COM port number assigned to the interface.
Within your chosen digital mode software (like WSJT-X‚ JTDX‚ or FLDIGI)‚ select the correct COM port from the available options. Configure the baud rate‚ data bits‚ stop bits‚ and parity settings to match the SignaLink USB’s default settings – typically 9600 baud‚ 8 data bits‚ no parity‚ and 1 stop bit.
Incorrect serial port settings will prevent the software from recognizing the interface‚ resulting in communication errors. Double-check all settings for accuracy.

Troubleshooting Common Issues
This section addresses frequent problems‚ including audio absence‚ PTT malfunctions‚ radio recognition failures‚ and driver conflicts‚ offering solutions for seamless operation.
No Audio Output
Experiencing a lack of audio is a common issue‚ often easily resolved with systematic checks. First‚ verify the audio settings within your chosen software program; ensure the SignaLink USB is selected as both the input and output device. Confirm the volume levels are appropriately adjusted‚ both in the software and within your computer’s system settings.
Next‚ inspect the physical connections – ensure the USB cable is securely connected to both the SignaLink USB and your computer. Try a different USB port‚ preferably a USB 2.0 port if available‚ as these are sometimes more reliable. Also‚ double-check the interface cable connecting the SignaLink USB to your radio; a loose or faulty cable can prevent audio transmission.
Finally‚ consider potential driver conflicts or outdated drivers. Reinstalling the latest drivers from the Tigertronics website can often resolve audio-related problems. If the issue persists‚ consult the radio-specific menu settings documentation‚ as incorrect settings can disable audio output.
PTT Not Functioning
A non-responsive PTT (Push-To-Talk) function can stem from several sources‚ requiring careful troubleshooting. Begin by verifying the PTT settings within your digital mode software. Ensure the correct serial port is selected and that the PTT method is appropriately configured – often utilizing a Data-to-Voice (DTV) setting. Confirm the software is actually seeing a PTT signal when activated.
Next‚ examine the interface cable connection to your radio. A faulty or loose connection can prevent the SignaLink USB from triggering the PTT function. Refer to the radio-specific documentation for correct jumper settings or menu configurations required for PTT operation with the SignaLink USB. Incorrect settings are a frequent cause.
Finally‚ check for driver issues or conflicts. Reinstalling the latest drivers from Tigertronics can resolve communication problems. If problems continue‚ test with alternative software to isolate whether the issue lies with the SignaLink USB or the original program.
Radio Not Recognized
If your radio isn’t recognized by the SignaLink USB‚ the initial step involves verifying the interface cable is securely connected to both the radio and the interface. Ensure you’re using the correct cable specifically designed for your radio model; generic cables often lack the necessary wiring. Consult the Tigertronics documentation for compatible cable options and radio-specific instructions.
Next‚ delve into your radio’s menu settings. Many radios require specific settings to enable data communication via the accessory port. These settings might include disabling the voice codec or selecting the correct data mode. Refer to your radio’s manual for detailed guidance on these configurations.
Finally‚ confirm the SignaLink USB drivers are correctly installed and functioning. Try a different USB port on your computer‚ and if issues persist‚ reinstall the latest drivers from the Tigertronics website. A driver conflict could also be the culprit.
Driver Conflicts

Driver conflicts can prevent the SignaLink USB from functioning correctly. This often occurs when other virtual COM port devices or USB audio interfaces are installed on your computer. To resolve this‚ begin by uninstalling any unnecessary COM port drivers through Device Manager in Windows. After uninstalling‚ reboot your computer before reinstalling the SignaLink USB drivers.
Ensure you download the latest drivers directly from the Tigertronics website to guarantee compatibility and avoid outdated versions. During installation‚ pay close attention to any prompts regarding driver signatures or security warnings‚ and follow the on-screen instructions carefully.
If conflicts persist‚ try temporarily disabling other USB devices to isolate the issue. A clean boot of Windows can also help identify conflicting software. Remember to re-enable devices after troubleshooting.

Advanced Features
Explore isolated audio capabilities‚ digital mode operation‚ firmware updates‚ and detailed technical specifications for maximizing the SignaLink USB’s potential.
Isolated Audio Explained
The SignaLink USB incorporates robust audio isolation technology‚ a crucial feature for eliminating ground loops and unwanted noise. Traditional audio connections can suffer from interference caused by differing electrical potentials between your radio and computer‚ resulting in buzzing or static. This isolation breaks that electrical connection‚ providing a clean and clear audio signal.
This is achieved through the use of transformers and specialized circuitry within the interface. By isolating the audio path‚ the SignaLink USB significantly improves audio quality‚ especially important for digital modes where clean signals are paramount. It prevents unwanted noise from being injected into your audio chain‚ leading to more reliable and successful digital communications. The isolated audio feature enhances the overall user experience and ensures optimal performance in various operating environments.
Using the Signalink USB with Digital Modes

The SignaLink USB excels in digital mode operation‚ offering a reliable interface for popular software like WSJT-X‚ FT8‚ and RTTY. Its isolated audio and precise timing capabilities are essential for successful digital communication. Proper configuration within your chosen software is key; ensure correct audio input/output settings and PTT control are established.
Experiment with audio levels to optimize signal strength and minimize distortion. The interface’s clean audio path contributes to improved decoding rates and overall digital mode performance. Remember to select the appropriate serial port and data bits settings within your software to match your radio’s configuration. The SignaLink USB’s robust design and isolated audio ensure a stable and noise-free connection for consistent digital communication results.
Firmware Updates
Maintaining up-to-date firmware on your SignaLink USB is crucial for optimal performance and compatibility with the latest software and radio models. Tigertronics periodically releases firmware updates to address bug fixes‚ enhance features‚ and improve overall stability. Check the Tigertronics website regularly for available updates and detailed instructions.
The firmware update process typically involves downloading a file and using a dedicated utility to flash it onto the interface. Carefully follow the provided instructions to avoid any potential issues during the update. A stable USB connection is essential throughout the process. Backing up your current configuration before updating is always recommended. Updated firmware ensures your SignaLink USB continues to deliver reliable and efficient digital communication capabilities.
Technical Specifications
The SignaLink USB is engineered for robust digital communication‚ featuring full isolation for noise reduction and safety. It supports USB 1.1‚ 2.0‚ and 3.0 connectivity‚ though USB 2.0 is often preferred for stability. The interface boasts high-quality audio codecs‚ ensuring clear transmission and reception. It operates on a standard 5V USB power supply‚ drawing minimal current.
Dimensions are compact for portability‚ and the enclosure is built for durability. The SignaLink USB provides PTT (Push-To-Talk) and audio input/output‚ alongside serial port emulation. It’s compatible with a wide range of digital modes‚ including FT8‚ RTTY‚ and PSK31. Detailed electrical characteristics and interface pinouts are available in the comprehensive documentation on the Tigertronics website;