
Clearwater Butterfly: A Comprehensive Guide
Embark on a captivating journey into the art of crafting Clearwater Butterflies! This guide unveils the secrets to creating these delicate wonders‚
from selecting the perfect materials to mastering advanced techniques. Discover how to transform simple paper into breathtaking displays‚
perfect for home décor‚ unique gifts‚ or enchanting event decorations. Let your creativity take flight!
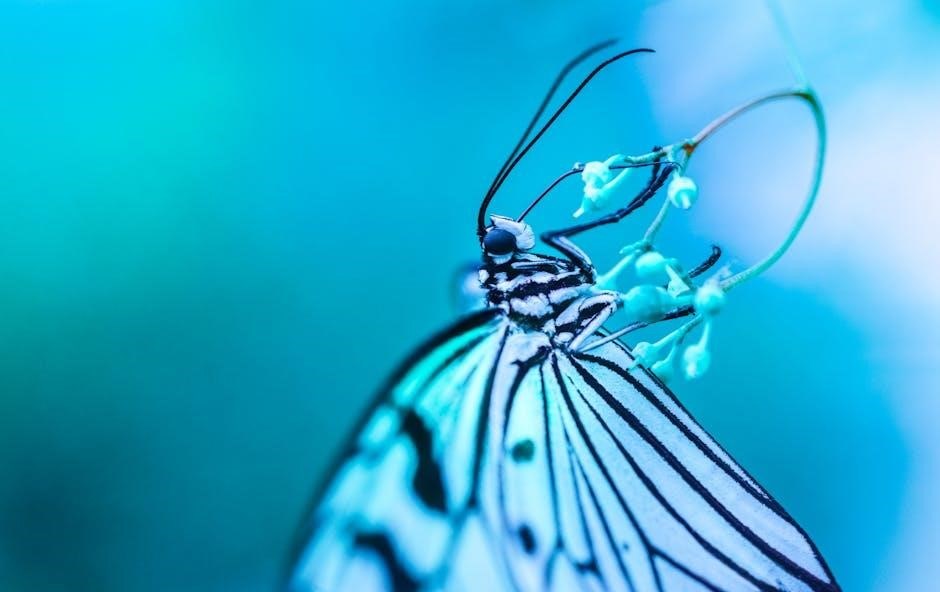
The Clearwater Butterfly represents a captivating intersection of origami‚ paper crafting‚ and artistic expression. Unlike traditional butterfly designs‚ the Clearwater style emphasizes a translucent‚ ethereal quality‚ mimicking the delicate beauty of a butterfly’s wings catching the light. This aesthetic is achieved through careful paper selection‚ precise cutting‚ and skillful folding techniques.
This guide will delve into the intricacies of creating these stunning paper artworks‚ offering step-by-step instructions suitable for both beginners and experienced crafters. We’ll explore the history of Clearwater Butterfly designs‚ the essential materials needed‚ and a range of techniques to elevate your creations. From basic folds to advanced 3D effects and embellishments‚ you’ll learn to bring these enchanting butterflies to life. Prepare to unlock a world of creativity and transform ordinary paper into extraordinary art!
What is a Clearwater Butterfly?
A Clearwater Butterfly is a specific style of paper butterfly characterized by its delicate‚ almost translucent appearance. It differs from conventional origami butterflies through a focus on creating a sense of lightness and ethereal beauty. The name evokes the clear waters of Florida‚ reflecting the design’s airy and bright aesthetic.
These butterflies aren’t simply folded; they often involve intricate cutting to create detailed wing shapes and vein patterns. The choice of paper is crucial – thinner‚ lighter-weight papers are preferred to achieve the desired translucency. Color palettes often lean towards soft‚ pastel shades or gradients‚ further enhancing the Clearwater effect. The finished product resembles a real butterfly’s wing‚ capturing its fragility and grace. They are popular for decorations‚ gifts‚ and artistic displays.
The History of Clearwater Butterfly Designs
The origins of Clearwater Butterfly designs are somewhat elusive‚ lacking a single definitive founder. However‚ the style appears to have emerged from the broader paper crafting and origami communities in the early 2000s‚ gaining traction through online tutorials and crafting forums. Early examples showcased a move away from strictly traditional origami folds‚ incorporating more intricate cutting techniques inspired by silhouette art.
The aesthetic likely draws inspiration from the natural beauty of the Clearwater‚ Florida region‚ known for its pristine beaches and vibrant ecosystems. As the style evolved‚ artists began experimenting with color gradients and 3D effects‚ pushing the boundaries of paper artistry. Today‚ Clearwater Butterflies continue to be a popular craft‚ with numerous variations and customizations reflecting individual creativity and skill.

Materials Needed for Clearwater Butterfly Creation
Gather essential supplies to begin! You’ll need quality paper‚ sharp scissors‚ a cutting mat‚ folding tools‚ and color mediums for stunning Clearwater Butterfly artistry.
Paper Selection: Weight and Type
Choosing the right paper is crucial for successful Clearwater Butterfly creation. Lightweight papers‚ around 60-80gsm‚ are ideal for intricate folding and delicate wing shapes‚ allowing for graceful curves and detailed cuts. However‚ these can tear easily‚ so handle with care! For beginners‚ a slightly heavier weight – 90-120gsm – offers more durability and forgiveness during the cutting and folding processes.
Consider the paper type as well. Smooth papers‚ like printer paper or layout paper‚ are excellent for achieving clean lines and vibrant color blending. Textured papers can add a unique dimension‚ but may be more challenging to work with for precise cuts. Vellum paper provides a translucent effect‚ beautifully mimicking a real butterfly’s wings. Experiment with different types to discover your preference and the aesthetic you wish to achieve. Remember‚ the paper’s quality directly impacts the final result!
Color Palettes: Achieving the Clearwater Effect
The “Clearwater” effect hinges on creating a sense of luminosity and translucence. Soft‚ pastel shades – pale blues‚ lavender‚ mint green‚ and peach – are excellent starting points‚ evoking the clear waters of the region. Gradient effects are key; blending lighter shades into darker tones simulates the natural variations found in butterfly wings.
Don’t limit yourself to traditional butterfly colors! Experiment with unexpected combinations like silver and turquoise‚ or coral and gold. Watercolor paper and inks are fantastic for achieving subtle washes and blended hues. Consider using multiple layers of color to build depth and complexity. For a truly ethereal look‚ incorporate iridescent or pearlescent papers that catch the light. Remember‚ the goal is to create a visually stunning effect that mimics the shimmering beauty of water and light.
Tools Required: Cutting‚ Folding‚ and Shaping
Precision is paramount when crafting Clearwater Butterflies‚ demanding a curated toolkit. A sharp craft knife‚ alongside a self-healing cutting mat‚ is essential for intricate wing designs. High-quality paper scissors are useful for larger cuts. A bone folder is invaluable for creating crisp‚ clean folds – crucial for symmetry and structure.
For shaping the wings‚ consider using sculpting tools or even rounded knitting needles. Tweezers can assist with delicate paper manipulation. A ruler and pencil are needed for accurate measurements and pattern tracing. Adhesive options include glue sticks (for larger areas) and liquid glue (applied sparingly for precision). Finally‚ a light box can be incredibly helpful when working with translucent papers‚ allowing you to see details more clearly.
Step-by-Step Instructions: Basic Clearwater Butterfly
Begin your Clearwater Butterfly journey with this simple guide! We’ll walk through each fold‚ cut‚ and shape‚ building a foundation for more complex designs.
Step 1: Initial Paper Fold – The Foundation
Establishing a solid base is crucial for a beautiful Clearwater Butterfly. Begin with a square sheet of your chosen paper – lightweight options work best for intricate folds. Carefully fold the paper diagonally‚ creating a crisp crease. Unfold‚ then repeat the fold along the other diagonal‚ forming an ‘X’ shape. This establishes the central point and primary axes for symmetry.
Next‚ fold the paper in half horizontally‚ and then vertically‚ creating a ‘+’ shape. These folds will serve as guidelines for shaping the wings. Ensure each crease is sharp and precise; a bone folder or similar tool can be incredibly helpful. The accuracy of these initial folds directly impacts the final butterfly’s symmetry and overall aesthetic. This foundational step sets the stage for the subsequent shaping and cutting processes‚ so take your time and focus on precision!
Step 2: Creating the Wing Shape – Precision Cutting
With the foundational folds complete‚ it’s time to define the butterfly’s wings. Using sharp‚ small scissors – ideally crafting scissors – begin carefully cutting along the folded edges. The goal is to create a symmetrical wing shape; consider sketching a template beforehand if you’re a beginner. Start with gentle curves‚ gradually refining the shape as you progress.
Avoid cutting directly on the central point where all folds intersect‚ as this will weaken the butterfly’s structure. Experiment with different wing styles – rounded‚ pointed‚ or scalloped – to achieve your desired aesthetic. Precision is key here; small‚ controlled cuts will yield the most elegant results. Remember to periodically unfold the paper slightly to check for symmetry and make adjustments as needed. A steady hand and patience are your greatest allies in this step!
Step 3: Folding the Wings – Achieving Symmetry
Now‚ bring your Clearwater Butterfly to life with strategic folding! Gently unfold the wings‚ then carefully fold them along the central body line‚ creating a subtle “V” shape. This fold is crucial for giving the butterfly its three-dimensional form and allowing it to stand or be displayed. Ensure both wings are folded at the same angle to maintain symmetry – a slight imbalance can affect the overall appearance.
For a more dynamic look‚ experiment with varying the fold angle. A steeper angle creates a more dramatic‚ open-winged pose‚ while a shallower angle results in a more closed‚ delicate appearance. Use a ruler or bone folder to create crisp‚ clean folds. Finally‚ gently manipulate the wings to refine their shape and ensure they are balanced and visually appealing.

Advanced Clearwater Butterfly Techniques
Elevate your artistry! Explore intricate methods like 3D wing curvature‚ realistic veining‚ and stunning color blending for truly captivating Clearwater Butterfly creations.
Creating 3D Effects – Wing Curvature
Breathing life into your Clearwater Butterflies requires mastering wing curvature. This technique transforms a flat paper creation into a dynamic‚ lifelike form. Gently use a rounded tool – the back of a spoon works wonderfully – to carefully mold the wings. Apply subtle pressure‚ working from the base of the wing outwards towards the tips.

Avoid harsh creases; the goal is a smooth‚ organic curve. Experiment with varying degrees of curvature for each wing to mimic natural butterfly flight. For more pronounced curves‚ lightly dampen the paper with water‚ allowing it to become more pliable before shaping. Remember to allow the wings to fully dry in their curved position to retain the desired form. This adds depth and realism‚ elevating your Clearwater Butterfly from a beautiful craft to a stunning work of art!
Adding Veining Details – Enhancing Realism
Elevate your Clearwater Butterfly’s realism with delicate veining details. This seemingly small addition dramatically enhances the illusion of life; Utilize a fine-tipped pen‚ preferably in a shade slightly darker than your chosen paper color‚ to meticulously draw the vein patterns. Observe real butterfly wings for accurate reference – patterns vary greatly between species!
Start with the main veins radiating from the body‚ then branch out with smaller‚ interconnecting lines. Vary the thickness and intensity of the lines to create depth; For a subtle effect‚ use a very light touch. Alternatively‚ employ embossing techniques using a stylus and a light pad to create raised veins. This adds a tactile dimension. Remember‚ accuracy and subtlety are key to achieving a truly lifelike appearance.
Color Blending Techniques – Gradient Effects
Achieve stunning visual depth in your Clearwater Butterflies through masterful color blending. Gradient effects mimic the natural iridescence found in butterfly wings‚ adding a captivating dimension to your creations. Employ watercolor pencils or diluted acrylic paints for seamless transitions. Begin with the lightest shade and gradually build up intensity‚ layering colors to create a smooth gradient.
Wet blending‚ using a damp brush to soften edges‚ is particularly effective. Alternatively‚ dry blending involves gently rubbing colors together with a blending stump or cotton swab. Experiment with analogous color schemes – hues adjacent on the color wheel – for harmonious gradients. Remember to work in thin layers‚ allowing each to dry before applying the next‚ to prevent muddiness. Practice makes perfect!

Variations and Customization
Unleash your artistic vision! Explore diverse wing shapes‚ add dazzling embellishments like beads or glitter‚ and create captivating butterfly colonies for stunning displays.
Different Wing Shapes – Exploring Designs
Beyond the classic silhouette‚ a world of wing shapes awaits! Experiment with elongated‚ pointed wings for a dramatic‚ soaring effect‚ reminiscent of swallowtails. Consider rounded‚ broader wings to evoke the gentle flutter of monarchs. Asymmetrical designs introduce a dynamic‚ organic feel‚ mirroring nature’s imperfections.
Don’t limit yourself to traditional symmetry; explore fractured or fragmented wing patterns for a modern‚ artistic touch. Utilize templates or freehand draw your own unique shapes onto the paper before cutting. Observe real butterfly species for inspiration‚ noting the subtle curves and angles that define their beauty. Remember‚ the shape of the wings dramatically alters the butterfly’s overall aesthetic‚ allowing for endless creative possibilities.
Varying the wing size within a colony can also create visual interest and depth.
Adding Embellishments – Beads‚ Glitter‚ and More
Elevate your Clearwater Butterflies with dazzling embellishments! Delicate seed beads‚ carefully glued along the wing edges‚ mimic the scales of a real butterfly‚ adding texture and shimmer. A light dusting of glitter introduces a magical‚ ethereal quality‚ catching the light with every movement. Consider using iridescent glitter for a truly captivating effect.
Experiment with tiny pearls or rhinestones to create intricate patterns or highlight specific wing details. Fine-tipped markers can be used to draw intricate designs‚ mimicking veining or adding unique artistic flourishes. Remember to apply adhesives sparingly to avoid warping the paper.
For a bolder statement‚ incorporate small‚ lightweight charms or ribbons to the butterfly’s body. Let your imagination soar and transform your creations into miniature works of art!

Creating Butterfly Colonies – Grouping and Display
Transform individual Clearwater Butterflies into breathtaking colonies! Grouping butterflies of varying sizes and colors creates a dynamic and visually stunning display. Consider arranging them in a cascading pattern‚ as if in flight‚ across a wall or window. Utilize clear fishing line to suspend them at different heights‚ enhancing the illusion of movement.
Shadow boxes provide an elegant and protected environment for showcasing your creations. Arrange butterflies on a backdrop of moss‚ silk flowers‚ or patterned paper to complement their delicate beauty. Alternatively‚ mount them onto branches or driftwood for a natural‚ organic aesthetic.
Experiment with different arrangements and lighting to create a captivating focal point in any room. A well-lit colony will truly showcase the intricate details of your Clearwater Butterflies!
Troubleshooting Common Issues
Overcome crafting challenges with ease! This section provides solutions for paper tearing‚ asymmetrical wings‚ and color bleeding‚ ensuring flawless Clearwater Butterfly creations.
Paper Tearing – Prevention and Repair
Preventing tears is paramount for graceful Clearwater Butterflies. Select higher-weight papers‚ minimizing fragility during cutting and folding. Employ sharp blades‚ replacing them frequently to avoid ragged edges and stress on the paper fibers; Gentle handling is crucial; avoid abrupt movements or excessive force. When cutting intricate details‚ utilize a self-healing cutting mat to protect your work surface and ensure clean lines.
Despite precautions‚ tears can occur. For minor tears‚ a delicate application of paper glue or a specialized paper repair tape can restore integrity. Apply sparingly to prevent visible residue or warping. Larger tears may require patching with a matching paper scrap‚ carefully aligning the grain for a seamless blend. Consider reinforcing vulnerable areas with thin strips of tissue paper before intricate cutting‚ providing added support and preventing future damage. Remember patience and a light touch are key to successful repair!
Asymmetrical Wings – Correcting Imbalances
Achieving symmetry is vital for a realistic Clearwater Butterfly. Carefully measure and mark wing shapes before cutting‚ ensuring both sides mirror each other. During folding‚ use a ruler or bone folder to create crisp‚ even creases. If asymmetry arises‚ gentle adjustments can often restore balance.
Minor imbalances can be corrected by subtly reshaping the wings. Gently curve or bend the larger wing downwards‚ or slightly lift the smaller one. For more significant discrepancies‚ carefully trim small sections from the larger wing‚ always prioritizing gradual adjustments. Avoid drastic cuts‚ as they can compromise the overall design. Consider adding delicate veining details to the smaller wing to visually balance the composition. Patience and a keen eye are essential for achieving harmonious symmetry!
Color Bleeding – Avoiding and Fixing Mistakes
Color bleeding can mar the delicate beauty of a Clearwater Butterfly. To prevent this‚ use high-quality‚ bleed-proof inks or watercolors specifically designed for paper crafting. Test your chosen medium on scrap paper first to assess its behavior. Apply colors in thin‚ even layers‚ allowing each layer to dry completely before adding another.
If bleeding occurs‚ immediate action is crucial. Gently blot the affected area with a clean‚ absorbent cloth – avoid rubbing‚ which can spread the stain. For minor bleeds‚ a slightly dampened cotton swab can carefully lift excess color. In severe cases‚ consider carefully layering a matching color over the bleed to camouflage it. Prevention is always best‚ but quick intervention can often salvage your creation!
Clearwater Butterfly Applications
Unleash your imagination! These ethereal butterflies elevate home décor‚ become heartfelt handmade gifts‚ and transform celebrations into magical experiences with their beauty.
Home Decor – Displaying Your Creations
Transform your living space with the delicate charm of Clearwater Butterflies! Consider creating a stunning butterfly wall art installation‚ arranging them in graceful patterns to mimic flight. For a whimsical touch‚ suspend butterflies from the ceiling at varying heights using invisible thread‚ creating a floating garden effect.
Display individual butterflies within elegant shadow boxes‚ highlighting their intricate details. Incorporate them into existing floral arrangements for a unique and artistic centerpiece. A cluster of butterflies adorning a mirror frame adds a touch of enchantment.
Experiment with color schemes to complement your existing décor – a monochromatic palette for a sophisticated look‚ or vibrant hues for a playful atmosphere. Remember to protect your creations from direct sunlight to prevent fading and maintain their pristine beauty for years to come.
Gift Ideas – Handmade Butterfly Presents
Clearwater Butterflies make incredibly thoughtful and unique handmade gifts! Present a single‚ exquisitely crafted butterfly in a delicate gift box‚ perfect for birthdays or as a token of appreciation. Create a miniature butterfly mobile for a nursery‚ offering a soothing and enchanting visual experience.
Assemble a collection of butterflies in a beautiful glass jar or dome‚ creating a captivating display piece. For a personalized touch‚ incorporate the recipient’s favorite colors or patterns into the butterfly designs. Consider crafting butterfly-themed greeting cards‚ attaching a small butterfly to each one for an extra special detail.
A set of butterflies paired with a crafting kit and instructions allows the recipient to explore their own creativity. These handmade gifts demonstrate care and artistry‚ leaving a lasting impression.
Event Decorations – Butterflies for Celebrations
Transform any event into a whimsical wonderland with Clearwater Butterfly decorations! String multiple butterflies together to create elegant garlands‚ perfect for adorning walls‚ ceilings‚ or tablescapes. Scatter individual butterflies across tables as charming confetti‚ adding a touch of delicate beauty.
Attach butterflies to chair backs or incorporate them into floral arrangements for a unique and eye-catching centerpiece. For weddings‚ create a stunning butterfly backdrop for photos‚ or use them to embellish wedding favors. Consider a themed color scheme‚ matching the butterflies to the event’s palette.
Larger butterfly colonies can create dramatic focal points‚ while smaller‚ strategically placed butterflies add subtle elegance. These decorations offer a personalized and enchanting touch to any celebration!

Resources and Further Learning
Expand your skills with online tutorials‚ origami books‚ and vibrant crafting communities! Explore video guides and forums for inspiration and shared techniques.
Online Tutorials – Video Guides and Websites
Dive into a wealth of online resources to elevate your Clearwater Butterfly artistry! Numerous platforms host detailed video tutorials‚ offering step-by-step guidance for beginners and seasoned crafters alike. Websites dedicated to origami and paper crafting frequently feature Clearwater Butterfly designs‚ providing downloadable templates and instructional diagrams.
YouTube channels specializing in paper art are excellent starting points‚ showcasing various techniques and customization options. Search for keywords like “Clearwater Butterfly tutorial‚” “paper butterfly origami‚” or “easy paper crafts” to discover a diverse range of content. Many instructors demonstrate folding techniques‚ cutting methods‚ and embellishment ideas.
Beyond video tutorials‚ explore dedicated crafting websites and blogs that offer written instructions‚ photo galleries‚ and community forums. These platforms allow you to connect with fellow enthusiasts‚ share your creations‚ and seek advice; Remember to explore resources that align with your skill level and preferred learning style.
Books on Origami and Paper Crafting
Expand your knowledge and refine your skills with dedicated literature on origami and paper crafting! While a book solely focused on Clearwater Butterflies might be rare‚ numerous publications offer foundational techniques applicable to creating these delicate designs. Look for books covering basic origami folds‚ paper cutting methods‚ and advanced paper shaping techniques.
Titles specializing in modular origami can inspire unique approaches to butterfly construction‚ while books on paper flowers provide insights into creating realistic petal shapes and textures. Explore resources that demonstrate color blending and gradient effects‚ essential for achieving the signature Clearwater aesthetic.
Don’t overlook books showcasing various paper types and their properties‚ helping you select the ideal materials for your creations. Libraries and online bookstores offer a vast selection; consider browsing reviews and previews to find books that match your skill level and artistic interests.
Communities and Forums – Sharing and Inspiration
Connect with fellow enthusiasts and unlock a wealth of knowledge within online communities and forums dedicated to origami and paper crafting! These platforms provide invaluable opportunities to share your Clearwater Butterfly creations‚ receive constructive feedback‚ and learn from experienced artists.
Search for dedicated groups on platforms like Facebook‚ Reddit‚ and specialized crafting websites. Many forums host tutorials‚ pattern exchanges‚ and troubleshooting discussions. Don’t hesitate to ask questions‚ offer assistance‚ and participate in challenges to enhance your skills.
Online galleries and social media hashtags (#origami‚ #papercraft‚ #clearwaterbutterfly) showcase inspiring work from around the globe. Engaging with these communities fosters creativity‚ provides motivation‚ and opens doors to collaborative projects. Embrace the power of shared learning!