
Child’s Bike Helmet Size Guide: A Comprehensive Overview (Updated 02/16/2026)
Navigating child helmet sizing can be tricky, especially with varying head sizes and brands like Giro, Animal, and woom.
Accurate measurement is key, ensuring optimal protection during every ride, and safety standards are met.
Understanding the Importance of Proper Fit
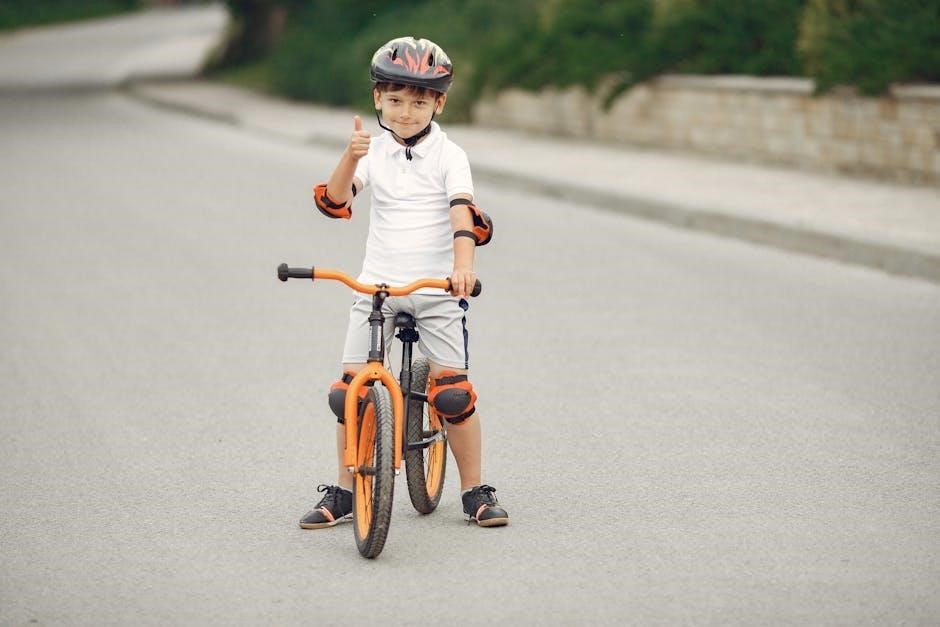
A correctly fitted bike helmet is paramount for a child’s safety, acting as the first line of defense against head injuries during a fall or collision. It’s not simply about having a helmet on their head; it’s about ensuring it provides adequate protection. A helmet that’s too large won’t stay securely in place, potentially shifting during impact and leaving vulnerable areas exposed. Conversely, a helmet that’s too small can be uncomfortable and may not offer sufficient coverage.
Consider a toddler with a larger-than-average head – finding the right fit becomes even more crucial. Brands like Giro offer size ranges, but individual head shapes vary. Proper fit isn’t just about circumference; it’s about how the helmet interacts with the child’s head shape. Prioritizing a secure, comfortable fit encourages consistent helmet use, fostering a lifelong habit of safety. Remember, a well-fitted helmet significantly reduces the risk of serious head trauma.
Why a Correctly Sized Helmet Matters
The human brain is particularly vulnerable, especially in developing children. A properly sized helmet absorbs the impact of a crash, dispersing the force and protecting the skull and brain. Ill-fitting helmets compromise this crucial protection, potentially leading to concussions, fractures, or more severe traumatic brain injuries. Even seemingly minor impacts can cause damage if the helmet doesn’t fit snugly and securely.
Beyond impact absorption, a correctly sized helmet enhances visibility and confidence. A stable helmet doesn’t obstruct the child’s vision, allowing them to focus on their surroundings. Furthermore, a comfortable fit encourages consistent use, making helmet-wearing a natural part of their cycling routine. Considering brands like Animal and Cool Bike Helmets, understanding their size ranges (49-55cm, 54-58cm respectively) is vital for optimal safety and peace of mind for parents.
Potential Risks of Ill-Fitting Helmets
An ill-fitting helmet offers a false sense of security, potentially exacerbating injury during a fall. If too large, it can shift upon impact, leaving the head exposed. Conversely, a helmet that’s too small won’t absorb impact effectively, and can be incredibly uncomfortable, discouraging use. Reddit discussions highlight challenges with larger-headed toddlers, emphasizing the need for precise measurement – a 20/51cm head requires careful consideration.
Beyond direct impact risks, improper fit can lead to distraction and impaired vision. A wobbly helmet can obstruct a child’s field of view, increasing the risk of collisions. Furthermore, a poorly adjusted chin strap can pose a strangulation hazard. Brands like Giro, with their universal child/youth sizing (47-57cm), require diligent fitting to mitigate these dangers, ensuring the helmet remains securely in place during activity.
Measuring Your Child’s Head
Accurate head circumference measurement is crucial for selecting the correct helmet size, starting at the forehead and wrapping around the head, as woom bikes suggests.
Tools Needed for Accurate Measurement
For precise helmet sizing, you won’t need specialized, expensive equipment. A flexible measuring tape is the primary tool; fabric or plastic versions work best, conforming easily to your child’s head shape. Avoid metal tapes, as they lack the necessary flexibility. Alternatively, a length of string or yarn can be used, then measured against a ruler or yardstick for accuracy.
Having a helper can be beneficial, especially with wiggly toddlers! It allows one person to focus on keeping the tape level while the other gently holds the child’s head still. A mirror can also be useful if you’re measuring independently, allowing you to visually confirm the tape’s position. Ensure the measuring tape is clean and free of any obstructions that could affect the reading. Finally, a pen and paper (or a note-taking app) are handy for recording the measurement immediately, preventing accidental loss of the crucial number.
Step-by-Step Head Circumference Guide
Begin by having your child stand or sit upright, maintaining a natural head position – not tilted up or down. Wrap the measuring tape around their head, starting approximately one inch (2.5 cm) above the eyebrows and ears. Ensure the tape passes horizontally, all the way around the largest part of the head.
Pull the tape snug, but not too tight; it should be comfortably firm. Read the measurement where the end of the tape meets the starting point. If the measurement falls between two sizes, it’s generally recommended to round up to the larger size. Repeat the measurement two or three times to confirm accuracy, as slight variations can occur. Record the final measurement in both centimeters (cm) and inches for broader compatibility with different sizing charts.
Where to Measure: Forehead and Occipital Lobe
Accurate helmet sizing hinges on measuring the head circumference correctly. Begin the measurement midway on the forehead, about one inch above the eyebrows. This ensures the helmet will sit properly, protecting the frontal lobe. Continue wrapping the measuring tape around the head, maintaining a level position, and extend it to the most prominent part of the occipital lobe – the bony bump at the back of the skull.
This area represents the widest part of the head for many children. It’s crucial to include this point in the measurement to guarantee a secure and encompassing fit. Avoid measuring over hats or thick hair, as this will lead to an inaccurate reading. A precise measurement at both the forehead and occipital lobe is fundamental for selecting the appropriate helmet size.
Helmet Sizing Charts: Age & Circumference
Utilizing age and head circumference charts is vital for initial sizing, though individual variations exist between brands like Animal and woom.
Measurements guide selection.
General Age-Based Sizing Guidelines
While head circumference is the most accurate measurement, age can provide a useful starting point for estimating the correct helmet size. However, it’s crucial to remember that children’s head sizes vary significantly, even within the same age group. Generally, toddlers aged 2-5 years old, with head circumferences typically ranging from 49 to 54 cm, often fit into smaller helmet sizes.
Children between 6 and 12 years old usually have head circumferences between 54 and 58 cm, requiring larger helmet sizes. These are broad guidelines, and it’s essential to prioritize accurate measurement over relying solely on age. For example, a larger toddler with a 51cm head might need a youth-sized helmet, while a smaller 6-year-old with a 53cm head could still fit a child-sized option. Always cross-reference age with a precise head circumference measurement and consult brand-specific sizing charts for the best fit; Remember, a properly fitted helmet is paramount for safety.
Detailed Sizing Chart (cm/inches)
Here’s a detailed sizing chart combining common measurements, offering guidance for selecting the appropriate helmet size. Please note these are general ranges, and brand variations exist.
| Size | Head Circumference (cm) | Head Circumference (inches) | Approximate Age |
|---|---|---|---|
| Extra Small | 47 ー 50 cm | 18.5 ⏤ 19.7 inches | 2-4 years |
| Small | 50 ー 54 cm | 19.7 ⏤ 21.3 inches | 4-7 years |
| Medium | 54 ⏤ 58 cm | 21.3 ⏤ 22.8 inches | 7-12 years |
| Large | 58 ー 61 cm | 22.8 ー 24 inches | 12+ years |
Always prioritize measuring your child’s head and referring to the specific brand’s sizing chart for the most accurate fit. Remember, a snug but comfortable fit is crucial for optimal protection.
Brand-Specific Size Variations
Helmet sizing isn’t universal; significant variations exist between brands. Giro Tremor MIPS offers “universal child” (47-54cm) and “universal youth” (50-57cm) options, catering to broader ranges. Animal Bike Helmets typically fit heads 49-55cm, generally suiting children aged 2-7 years.
woom Bikes emphasizes accurate head circumference measurement for their helmets, as sizing is crucial for their specific designs. Cool Bike Helmets generally fit children aged 6-12 with a size range of 54-58cm.
Always consult the manufacturer’s size chart before purchasing. A helmet fitting well from one brand may not fit correctly from another. Prioritize individual measurements over age-based guidelines to ensure a secure and protective fit for your child.
Helmet Size Ranges & Common Brands
Exploring popular brands like Giro, Animal, woom, and Cool Bike Helmets reveals diverse sizing approaches, ranging from 47cm to 58cm, impacting fit and safety;
Giro Tremor MIPS Sizing (Universal Child & Youth)
The Giro Tremor MIPS helmet is a popular choice, offering excellent protection for young riders. It comes in two sizes: Universal Child and Universal Youth. The Universal Child size is designed to fit head circumferences ranging from 47 to 54 centimeters (approximately 18.5 to 21.3 inches). This size generally suits younger children, providing a snug and secure fit.
Conversely, the Universal Youth size accommodates head sizes from 50 to 57 centimeters (roughly 19;7 to 22.4 inches). This is ideal for older children and youths who have outgrown the smaller size. A Reddit user highlighted the challenge of fitting a toddler with a larger head, specifically mentioning a 51cm circumference, which falls within the Universal Youth range.
It’s crucial to accurately measure your child’s head to determine the appropriate size. While these ranges provide a guideline, individual head shapes can vary, so a proper fit is paramount for safety and comfort. Always prioritize a snug, level fit and utilize the helmet’s adjustment features.
Animal Bike Helmets Sizing (2-7 Years)
Animal Bike Helmets are specifically designed for younger children, typically fitting those aged 2 to 7 years old. According to Crazy Safety, Animal helmets generally fit head circumferences ranging from 49 to 55 centimeters. This sizing caters to the developing heads of toddlers and young children, providing a comfortable and secure fit during their cycling adventures.
It’s important to note that these are general guidelines, and individual variations in head size and shape can occur. Always measure your child’s head circumference accurately to ensure the best possible fit. A helmet that is too large will not provide adequate protection, while one that is too small can be uncomfortable and restrictive.
Prioritize a snug fit that sits level on the head, covering the forehead adequately. Animal helmets are known for their stylish designs and focus on safety, making them a popular choice for parents seeking reliable head protection for their little ones.
woom Bikes Helmet Sizing
woom Bikes emphasizes the importance of accurate head circumference measurement when selecting a helmet for your child. Their FAQ section highlights this as the crucial first step in ensuring a proper fit. woom helmets are designed to grow with your child, offering adjustable features for a customized and secure experience.
To determine the correct size, begin measuring in the middle of your child’s forehead and wrap the measuring tape around the largest part of their head. woom doesn’t provide specific size ranges tied to age, reinforcing the need for individual measurement. This approach acknowledges the significant variation in head sizes among children of the same age.
A well-fitted woom helmet will provide optimal protection and comfort, allowing your child to enjoy their rides with confidence. Always refer to woom’s official sizing guide and adjust the helmet’s retention system for a snug, level fit.
Cool Bike Helmets Sizing (6-12 Years)
Cool Bike Helmets offers sizing specifically geared towards children aged 6 to 12 years. According to Crazy Safety, a retailer providing information on Cool Bike Helmets, these helmets generally fit head circumferences ranging from 54 to 58 centimeters. This sizing caters to the growing heads of school-aged children who are becoming more independent riders.
It’s important to remember that these are general guidelines, and individual head shapes and sizes can vary. A precise measurement of your child’s head circumference is still recommended to ensure the best possible fit. Don’t solely rely on age as a determining factor, as some children may require a different size.
Proper adjustment of the helmet’s retention system and straps is crucial, even within the 54-58cm range, to guarantee a secure and comfortable fit for optimal protection during bike rides.
Adjusting the Helmet for a Secure Fit
Fine-tuning the retention system, chin strap, and side straps is vital for a snug, stable fit, maximizing protection and comfort during every cycling adventure.
Using the Retention System
The retention system, often a dial at the back of the helmet, is crucial for achieving a personalized and secure fit. Begin by loosening the dial completely to easily place the helmet on your child’s head. Once positioned correctly, slowly tighten the dial until the helmet feels snug but not overly tight.
You should feel resistance as you turn the dial, indicating the system is engaging. Avoid over-tightening, as this can cause discomfort and potentially compromise the helmet’s effectiveness. The helmet should not shift noticeably on the head when your child moves their head around.
Many helmets also feature adjustable pads inside, offering further customization for a comfortable and precise fit. Experiment with different pad thicknesses to eliminate any pressure points and ensure a secure hold. Regularly check the retention system before each ride to confirm it remains properly adjusted.
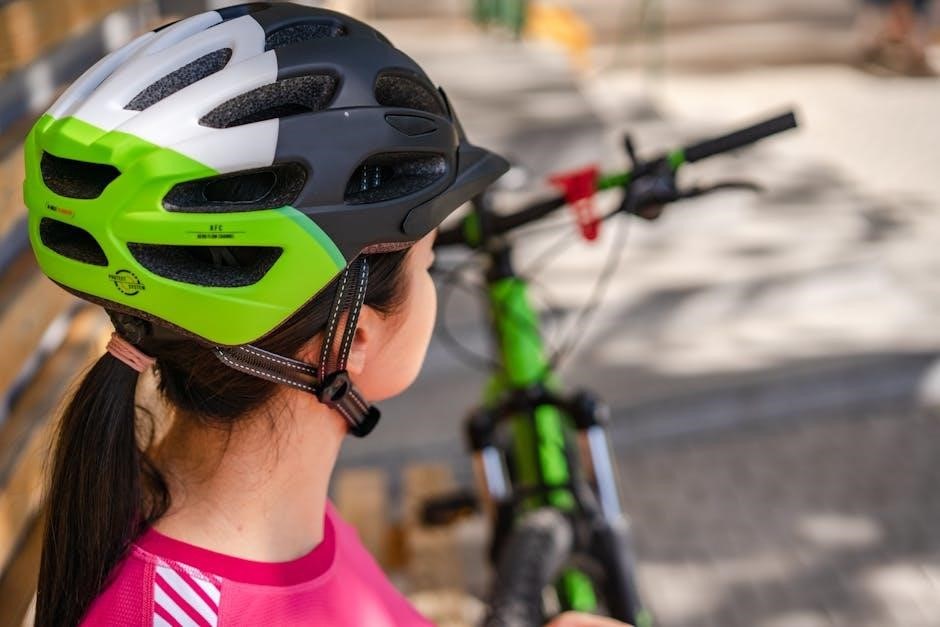
Chin Strap Adjustment & Proper Positioning
Once the helmet is securely positioned and the retention system is adjusted, focus on the chin strap. The strap should form a “V” shape just below the ears. Adjust the sliders on either side of the strap to achieve this correct positioning. Ensure the strap isn’t too loose, allowing the helmet to move, or too tight, restricting breathing or causing discomfort.
A good rule of thumb is that you should be able to fit one or two fingers comfortably between the strap and your child’s chin. The buckle should be centered and fastened securely. Regularly check that the buckle is functioning correctly and that the strap isn’t twisted.
Proper chin strap adjustment prevents the helmet from shifting backward during an impact, maximizing protection. Encourage your child to practice fastening and unfastening the buckle themselves, fostering independence and safety awareness.
Side Strap Adjustment for Stability
The side straps, also known as the Y-straps, play a crucial role in helmet stability. These straps connect the front and rear of the helmet and should be adjusted to create a snug, comfortable fit around the ears. The goal is to prevent the helmet from rocking side to side or front to back during activity.
Begin by loosening both side straps equally. Then, adjust each strap individually until they form a flat “Y” shape just below and slightly in front of the earlobes. Ensure the straps don’t obstruct hearing or pinch the skin. A properly adjusted side strap will keep the helmet centered on the head.
Regularly check these straps for wear and tear, and readjust as needed, especially as your child grows. Correct side strap adjustment complements the retention system and chin strap, providing a secure and reliable fit.
Recognizing a Properly Fitted Helmet
A secure fit means a level forehead, limited side-to-side or front-to-back movement, and passing the “two-finger rule” test for optimal safety.
The “Two-Finger Rule” Test
The “two-finger rule” is a simple, effective method for quickly assessing whether a child’s bike helmet fits snugly and securely. Once the helmet is properly positioned on the head, and the retention system and chin strap are adjusted, place two fingers – typically your index and middle finger – between the helmet’s padding and your child’s forehead.
If you can comfortably slide two fingers under the helmet’s front edge, the fit is generally considered correct. If you can easily slide more than two fingers underneath, the helmet is too loose and needs further adjustment. Conversely, if you can’t fit two fingers, the helmet is likely too tight and could be uncomfortable or restrict blood flow.
Remember, this test is a guideline, and individual head shapes vary. Always combine it with other fit checks, such as ensuring level coverage and checking for movement during activity, to guarantee the best possible protection.
Ensuring Level Coverage of the Forehead
Proper forehead coverage is crucial for a bike helmet to effectively protect a child during a fall. The helmet should sit level on the head, approximately one to two finger-widths above the eyebrows. This positioning ensures that the forehead, the most vulnerable part of the head in many cycling accidents, is adequately shielded.
Avoid positioning the helmet too far back on the head, exposing the forehead, or too low, obstructing vision. A tilted helmet compromises its protective capabilities, potentially allowing the head to impact the ground during a crash.
Check in a mirror to visually confirm level coverage. Adjust the internal padding or retention system as needed to achieve the correct positioning. Combine this check with the “two-finger rule” and movement tests for a comprehensive fit assessment.
Checking for Movement During Activity
A truly secure helmet fit isn’t just about static adjustments; it needs to hold firm during actual bike riding. After initial fitting and strap adjustments, have your child wear the helmet while simulating cycling movements – shaking their head from side to side and up and down.
Observe if the helmet shifts noticeably, rotates, or feels loose. Any significant movement indicates the retention system or straps require further tightening. The helmet should remain stable and feel securely attached to the head throughout these motions.
Encourage your child to provide feedback on comfort and stability. A well-fitted helmet shouldn’t cause pressure points or restrict movement, but it should feel snug and unyielding during activity. This dynamic test is vital for confirming a safe and effective fit.
Helmet Recalls & Safety Standards
Staying informed about recalls, like those from Bell Sports, and understanding certifications like CPSC and ASTM are crucial for ensuring your child’s helmet meets safety requirements.
Staying Informed About Helmet Recalls (Bell Sports Example)
Helmet recalls are issued when a safety defect is identified, potentially compromising protection during a crash. Manufacturers like Bell Sports sometimes initiate voluntary recalls to address these issues. It’s vitally important for parents and guardians to proactively stay informed about potential recalls affecting their child’s helmet. Regularly checking the manufacturer’s website – in this case, Bell Sports – is a good starting point.
Furthermore, the Consumer Product Safety Commission (CPSC) maintains a database of product recalls, including bicycle helmets. Subscribing to CPSC email alerts or regularly visiting their website (cpsc.gov) can provide timely notifications. When a recall is announced, carefully compare the helmet’s model number and manufacturing date with the details provided in the recall notice. If a match is found, immediately discontinue use of the helmet and follow the manufacturer’s instructions for a refund, replacement, or repair. Prioritizing recall awareness is a critical component of child bike safety.
Understanding Safety Certifications (CPSC, ASTM)
Ensuring a child’s bike helmet meets stringent safety standards is paramount. In the United States, the Consumer Product Safety Commission (CPSC) certification is mandatory for all bicycle helmets sold. This certification signifies the helmet has passed rigorous impact and retention testing, meeting federal safety requirements. Look for the CPSC sticker inside the helmet.
Additionally, some helmets may also carry ASTM International certification. While CPSC focuses on basic safety, ASTM standards often involve more comprehensive testing protocols. Both certifications demonstrate a commitment to safety, but CPSC is the legal requirement. Understanding these certifications empowers parents to make informed decisions. A certified helmet provides a crucial layer of protection, minimizing the risk of head injury in the event of a fall or collision, and offering peace of mind during every ride.
Importance of MIPS Technology
MIPS, or Multi-directional Impact Protection System, represents a significant advancement in helmet safety technology. Traditional helmets primarily protect against direct impacts. However, many bicycle accidents involve angled impacts, where rotational forces are transferred to the brain. MIPS addresses this by incorporating a low-friction layer inside the helmet.
This layer allows the helmet shell to rotate slightly relative to the head during an impact, reducing the rotational forces transmitted to the brain. Helmets like the Giro Tremor MIPS utilize this technology, offering an extra layer of protection. While not a substitute for a properly fitted helmet, MIPS can significantly reduce the risk of concussion and other brain injuries. Investing in a MIPS-equipped helmet is a proactive step towards enhancing your child’s safety on every bike ride.
When to Replace a Bike Helmet
Replace helmets after any impact, even without visible damage, or if showing signs of degradation from UV exposure or age, ensuring continued safety.
After an Impact, Even Without Visible Damage
A bike helmet is designed for a single impact. Even if there’s no visible cracking or denting after a fall, the protective foam inside—crucial for absorbing shock—is compressed. This compression permanently reduces the helmet’s ability to protect your child in a future incident.
Think of it like a car’s airbag; once deployed, it needs replacing. The internal structure of the helmet is altered during an impact, even a seemingly minor one. Continuing to use a helmet after a crash compromises your child’s safety significantly. It’s a difficult decision, especially if the helmet looks fine, but prioritizing safety means replacing it immediately. Don’t risk a second impact with a compromised helmet; a new one is a small price to pay for peace of mind and your child’s well-being.
Signs of Helmet Degradation (UV Exposure, Age)
Over time, the materials in a bike helmet degrade, even with careful storage. Prolonged exposure to ultraviolet (UV) rays from the sun weakens the protective foam and the outer shell, reducing its impact resistance. Look for signs like fading color, chalkiness, or visible cracks in the shell – these indicate UV damage.
Age also plays a role; manufacturers generally recommend replacing helmets every 3-5 years, regardless of visible condition. The foam can compress and lose its protective qualities simply due to the passage of time. Regular inspection is vital. If you notice any deterioration, or if the helmet is past its recommended lifespan, it’s time for a replacement. Prioritize safety and replace the helmet to ensure continued protection for your child.
Growing Out of a Helmet: Re-sizing Considerations
Children grow quickly, and a properly fitted helmet today might be too small within a season. Avoid buying a helmet that’s “room to grow” as a loose helmet offers significantly reduced protection. Instead, focus on accurate initial sizing and regular checks.
Many helmets feature adjustable retention systems and straps, allowing for some degree of customization. However, these adjustments have limits. If your child’s head circumference exceeds the helmet’s maximum size, or if adjustments can’t achieve a secure fit, it’s time for a new helmet. Don’t compromise on safety; a correctly sized helmet is paramount. Prioritize frequent head measurements to stay ahead of growth spurts.