
Craftsman garage door openers provide reliable access and security for homes, backed by a 90-day full warranty and a limited one-year coverage.
Overview of Craftsman Models
Craftsman offers various garage door opener models, including the 1/2 HP versions like 53479, 139.3043, and 139.53990, designed for residential use. These openers feature keyless entry options and are readily supported through online resources like the Internet Archive. Manuals are available for download, and used copies can be found on platforms like eBay. Understanding your specific model number is crucial for accessing the correct documentation and ensuring proper installation and maintenance, maximizing the lifespan of your opener.
Safety Precautions
Prior to installing or servicing your Craftsman garage door opener, disconnect power. Always test the safety reversing sensor and safety reverse system as detailed in the manual. Never allow children to operate the opener, and keep the remote controls out of their reach. Regularly inspect all hardware for wear and tear. Proper installation, operation, and maintenance are vital for safe and reliable performance. Refer to the owner’s manual for detailed safety instructions and warnings to prevent potential injuries.
Understanding Your Craftsman Garage Door Opener
Familiarize yourself with the system’s components, remote functions, and wall control panel for optimal operation and troubleshooting, as outlined in the manual.
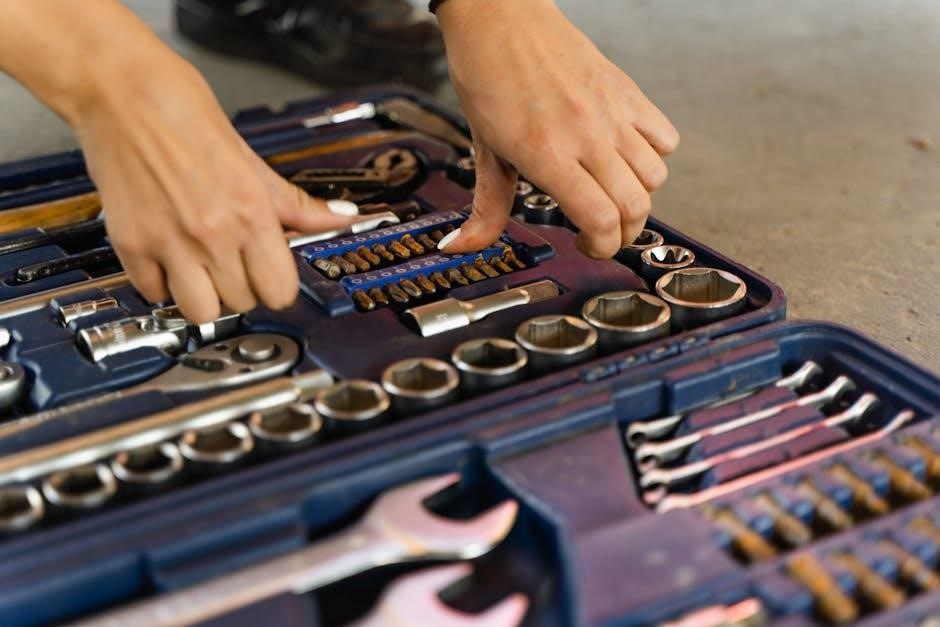
Components of the System
The Craftsman garage door opener system includes several key parts working in unison. These consist of the opener motor unit itself, the door arm connecting to the door, and the trolley which travels along the track. Safety sensors are crucial, preventing the door from closing on obstructions.
Furthermore, the system features a remote control for convenient operation, and a wall control panel for internal access. Understanding each component’s function, as detailed in the owner’s manual, is vital for proper use and maintenance, ensuring long-lasting performance and safety.
Remote Control Functions
Your Craftsman garage door opener’s remote control provides convenient, wireless operation. Typically, a single button press activates the door’s opening and closing sequence. Multiple remotes can be programmed for family members, enhancing accessibility. The manual details programming procedures for adding or clearing remotes, ensuring secure access.
Keyless entry functionality, if equipped (model 139.53990), offers an alternative access method. Always refer to the owner’s manual for specific remote features and troubleshooting steps related to remote functionality.
Wall Control Panel Operation
The wall-mounted control panel serves as a primary, hardwired operational interface for your Craftsman garage door opener. A simple push-button design allows for manual control, offering a backup when remotes are unavailable. The panel often features a lock-out function to prevent accidental or unauthorized operation, enhancing security.
Consult your owner’s manual for specific panel features and troubleshooting guidance. Proper operation ensures reliable access and complements the remote control system for convenient use.

Installation Guide
Proper installation involves attaching the door arm to the trolley, carefully wiring safety sensors, and ensuring secure connections for optimal performance and safety.
Attaching the Door Arm
Securely connecting the door arm is a crucial step during installation. Align the arm with the trolley, ensuring a firm and stable connection point. Double-check all bolts and fasteners for tightness, preventing any potential disconnections during operation. Refer to the manual for specific instructions related to one-piece doors, as the process may differ. Proper alignment guarantees smooth door movement and prevents strain on the opener mechanism. Incorrect attachment can lead to operational issues or safety hazards, so meticulous attention to detail is essential throughout this phase.
Connecting to the Trolley (One-Piece Doors)
For one-piece doors, a specific connection method to the trolley is required; The manual details this process on page 27, emphasizing precise alignment. Ensure the door arm securely attaches to the trolley, utilizing all provided hardware. Verify the connection allows for smooth, unrestricted door travel. Improper attachment can cause binding or prevent the opener from functioning correctly. Regularly inspect this connection point for any looseness or wear, maintaining optimal performance and safety. Following the manual’s guidance is vital for a successful installation.
Wiring the Safety Sensors
Proper safety sensor wiring is crucial for preventing accidental door closure and ensuring user safety. Connect the sensor wires to the designated terminals on the opener unit, referencing the wiring diagram in the manual. Ensure a secure and insulated connection to avoid signal interference. Test the sensors after wiring, verifying they trigger the safety reverse function. Miswired or faulty sensors compromise the system’s safety features. Always disconnect power before working with wiring, and consult a qualified technician if unsure about the process.
Troubleshooting Common Issues
Addressing common problems like a non-responsive opener, unexpected door reversal, or safety sensor malfunctions is vital for maintaining functionality and safety.
Opener Not Responding
If your Craftsman opener fails to respond, first check the power supply – ensure it’s properly plugged in and the circuit breaker hasn’t tripped. Verify the batteries in your remote control are fresh and functioning correctly. Confirm the wall control panel is also receiving power.
Additionally, inspect the safety sensors to ensure they are aligned and free from obstructions. A misaligned sensor will prevent operation. Finally, test the lock feature; it may be engaged, blocking operation.
Door Reverses Unexpectedly
Unexpected door reversal often indicates a problem with the safety sensors or the force settings. First, meticulously check the safety sensors for obstructions or misalignment – even slight adjustments can cause issues. Ensure nothing is blocking the sensor beams.
Next, verify the opener’s force settings aren’t too sensitive. Adjusting these settings may resolve the problem. If the issue persists, a spring imbalance or obstruction in the door’s path could be the cause, requiring professional attention.
Safety Sensor Problems
If your Craftsman opener isn’t responding, or the door reverses unexpectedly, the safety sensors are the prime suspects. These sensors, located near the floor on either side of the door, create an invisible beam. Any obstruction breaking this beam triggers a reversal for safety.
Check for dirt, debris, or misalignment. Clean the sensor lenses and ensure they are pointed directly at each other. A flashing LED on the sensors indicates proper function; no flash suggests a problem requiring troubleshooting or replacement.

Maintenance and Care
Regularly lubricate moving parts, check chain/belt tension, and inspect all hardware for wear and tear to ensure optimal performance and longevity.
Regular Lubrication
Maintaining proper lubrication is crucial for smooth and quiet operation of your Craftsman garage door opener. Periodically apply a lithium-based grease to the moving parts, including the chain or belt, rollers, and springs. Avoid using oil-based lubricants, as they can attract dust and grime.
Ensure the track is clean before lubricating. This prevents buildup and ensures the lubricant reaches the necessary components. Consistent lubrication extends the lifespan of your opener and reduces strain on the motor.
Checking Chain/Belt Tension
Proper chain or belt tension is vital for efficient operation and prevents premature wear. Inspect the chain or belt regularly for looseness. A slightly loose chain or belt can cause slipping and reduce lifting power. If the chain sags significantly, or the belt feels slack, it requires adjustment.
Refer to your owner’s manual for specific tensioning instructions, as procedures vary by model. Correct tension ensures smooth, reliable performance and extends the life of your Craftsman opener.
Inspecting Hardware
Regular hardware inspection is crucial for maintaining a safe and functional garage door opener. Carefully examine all bolts, nuts, and screws on the rail, door arm, and trolley. Tighten any loose connections to prevent unwanted movement or potential failures.
Check for signs of wear, corrosion, or damage on all components. Replace any worn or damaged parts immediately to ensure continued safe operation. A proactive approach to hardware maintenance extends the opener’s lifespan.

Safety Features Explained
Craftsman openers feature safety reversing sensors and systems, crucial for preventing door-related injuries; regular testing ensures optimal functionality and peace of mind.
Safety Reversing Sensor Test
To test the safety reversing sensor, place a one-inch-high object (like a 2×4 piece of wood) in the door’s path. Fully close the door. The door should immediately stop and reverse to the open position upon contacting the object.
If the door doesn’t reverse, do not proceed. Check the sensor wiring and alignment. Ensure nothing obstructs the sensor beams. A properly functioning sensor is vital for preventing accidents and ensuring safe operation of your Craftsman garage door opener.
Safety Reverse System Test
The safety reverse system tests the opener’s force settings. With the door fully closed, gently pull on the emergency release cord. The door should immediately reverse upward. This confirms the system is responding correctly to obstructions and preventing excessive force.
If the door doesn’t reverse, adjust the force settings according to the manual. Never disable this feature. A functioning safety reverse system is crucial for preventing damage to the door and ensuring the safety of people and objects in the garage area.
Operation Safety Instructions
Always keep people and objects clear of the door’s path while operating. Never allow children to play near the garage door or remote controls. Regularly test safety sensors to ensure they are functioning correctly, preventing accidental closure on obstructions.
Do not run the opener repeatedly if the door encounters resistance, as this could damage the system. If issues persist, consult the manual or a qualified technician. Prioritize safety during every operation.

Remote Programming
Program additional remotes easily using the learn button on the opener unit, or clear all remotes for security purposes as needed.
Programming Additional Remotes
To program a new remote, locate the “learn” button on your Craftsman garage door opener motor unit. Press and release this button – a small LED indicator light will illuminate. Within 30 seconds, press and hold the button on the new remote control you wish to program.
The opener light should blink, confirming successful programming. If it doesn’t work initially, repeat the process, ensuring a clear line of sight between the remote and the opener unit. This simple process allows for convenient access control.
Clearing All Remotes
To erase all programmed remotes from your Craftsman garage door opener’s memory, locate the “learn” button on the motor unit. Press and hold the “learn” button until the indicator light begins to flash rapidly. This process typically takes several seconds – consult your specific model’s manual for precise timing.
This action effectively clears the system, requiring you to reprogram all remotes. It’s a useful step for security if a remote is lost or stolen, ensuring unauthorized access is prevented.
Keyless Entry Programming (if applicable)
If your Craftsman opener features keyless entry, programming involves creating a unique PIN code for access. Begin by entering the programming mode, often initiated via the “learn” button or a dedicated keyless entry button on the motor unit. The system will prompt you to enter your desired four-digit code.
Confirm the code by re-entering it. Test the functionality to ensure correct operation. Refer to your model’s specific manual for detailed instructions, as procedures can vary.

Warranty Information
Craftsman offers a 90-day full warranty covering defects, followed by a limited warranty for replacement parts through the first year of ownership.
90-Day Full Warranty
For a period of 90 days from the original purchase date, Sears will diligently repair any defect found in the material or workmanship of your Craftsman garage door opener, completely free of charge. This comprehensive coverage ensures peace of mind during the initial phase of ownership. Should any component prove faulty due to manufacturing errors, Sears will provide the necessary repairs to restore the opener to full functionality, without any cost to the customer. This warranty reflects Craftsman’s commitment to quality and customer satisfaction.
Limited Warranty (91st Day ⏤ 1 Year)
Extending beyond the initial 90-day period, a limited warranty remains in effect from the 91st day up to one full year from the date of purchase. During this phase, Sears will furnish replacement parts, free of charge, for any defective components. However, please note that the customer assumes responsibility for all labor costs associated with the replacement or repair. This warranty ensures continued support and addresses potential part failures, offering lasting value and peace of mind beyond the initial full warranty period.
Motor Specific Warranty
Craftsman offers a dedicated limited warranty specifically for the 1/2 HP motors utilized in their garage door openers, dating back to January 1st, 1993. Details regarding the duration and specific coverage of this motor warranty are available upon request and may differ from the standard limited warranty. This specialized coverage acknowledges the motor as a critical component, ensuring its reliable performance and longevity. Refer to supplemental documentation for complete terms and conditions pertaining to the motor’s warranty coverage.

Technical Specifications
Craftsman garage door openers, like models 53479, 139.3043, and 139.53990, typically feature a 1/2 HP motor and are designed exclusively for residential use.
Horsepower (1/2 HP)
Craftsman garage door openers commonly utilize a 1/2 horsepower (HP) motor, providing sufficient power for most standard residential garage doors. This motor size balances performance with energy efficiency, offering reliable operation for daily use. The 1/2 HP motor is covered by a limited warranty, extending beyond the initial 90-day full warranty period. Specific warranty details for the motor itself can vary, but generally offer coverage for defects in materials or workmanship for a defined period after the initial purchase date.
Model Numbers (53479, 139.3043, 139.53990)
Craftsman garage door openers are identified by specific model numbers, including 53479, 139.3043, and 139.53990. These numbers are crucial for locating the correct owner’s manual, replacement parts, and troubleshooting information. The Internet Archive offers downloadable user guides for model 139.3043. eBay frequently lists original instruction manuals for various Craftsman models. Knowing your specific model number ensures you access the most accurate and relevant support resources for your opener’s features and maintenance.
Residential Use Only
Craftsman garage door openers, as explicitly stated in the provided documentation, are designed and warranted for residential use exclusively. Commercial or industrial applications will void the warranty. The 1/2 HP models (like 53479) fall under this restriction. Proper installation and maintenance, following the owner’s manual instructions, are vital for safe and reliable operation within a home environment. Utilizing the opener outside its intended residential purpose may lead to malfunction and potential safety hazards.
Finding Manuals and Support
Craftsman manuals are available via the Internet Archive, eBay for used copies, and directly through Sears/Stanley Black & Decker’s support channels.
Internet Archive Resources
The Internet Archive hosts a valuable resource for Craftsman garage door opener manuals, including model 139.3043. Users can freely download, borrow, and stream these guides in PDF format. Multiple files are available, including single-page processed JP2 ZIP downloads and torrent options. Currently, 17 files and 6 original documents are accessible, offering comprehensive support for older models and providing a digital archive for these essential homeowner resources.
eBay for Used Manuals
eBay offers a marketplace for acquiring used Craftsman garage door opener manuals, specifically pamphlets for models like the 139.53990. Sellers specializing in used tools, often sourced from auctions and estate sales, list these guides. Expect prompt responses from sellers, typically within 24 hours. These manuals are essential for owners needing instructions and are a viable option when original documentation is lost or unavailable.
Sears/Stanley Black & Decker Support
Craftsman garage door openers are currently supported by Sears and Stanley Black & Decker. While direct access to specific manuals might require searching online archives or marketplaces like eBay, contacting their customer support channels can provide assistance. They may offer troubleshooting advice, parts information, or potentially direct you to available digital resources for your specific model.