
Kärcher K2 Pressure Washer Instructions: A Comprehensive Guide (Updated 02/16/2026)
Welcome! This detailed manual unlocks your Kärcher K2’s potential, offering a complete overview of features and functions for optimal cleaning performance and longevity.
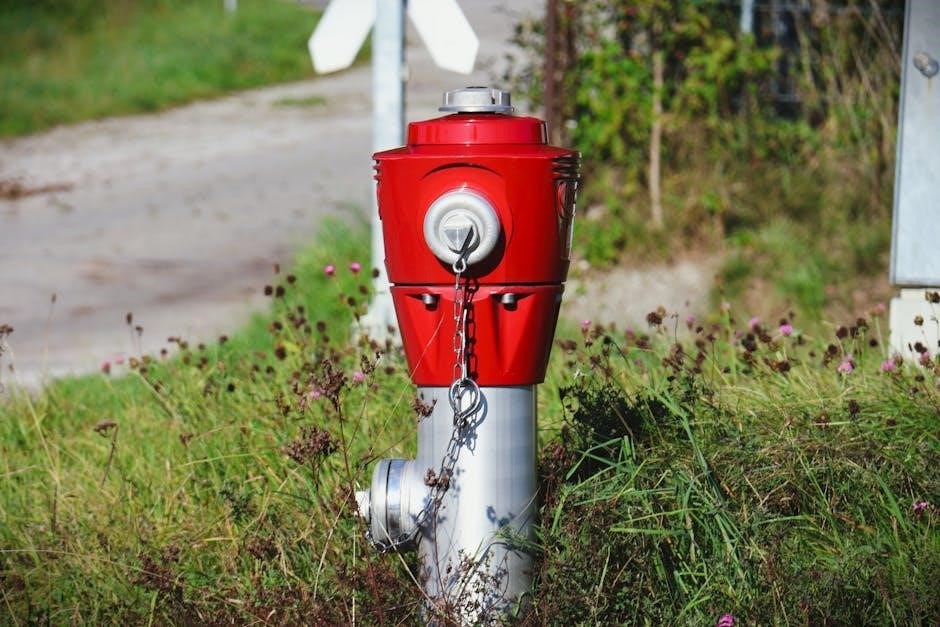
The Kärcher K2 is a compact and versatile pressure washer designed for light to medium-duty cleaning tasks around your home and garden. It’s an excellent entry-level model, perfect for washing cars, bikes, patio furniture, and smaller paved areas. This guide provides comprehensive instructions to ensure safe and effective operation.

This pressure washer distinguishes itself through its ease of use and efficient performance. It delivers powerful cleaning capabilities in a lightweight and manageable package. The K2 is ideal for users seeking a reliable cleaning solution without the complexity of more advanced models.
Before you begin, carefully read this manual to familiarize yourself with the K2’s features, safety precautions, and operating procedures. Understanding these guidelines will maximize the lifespan of your appliance and guarantee optimal cleaning results. We aim to help you master your K2 and enjoy a sparkling clean environment!
Unboxing and Component Identification
Upon unboxing your Kärcher K2, carefully inspect all components to ensure everything is present and undamaged. The box should contain the pressure washer unit itself, a high-pressure hose, a spray gun, a Vario Power lance, and potentially a detergent suction tube (depending on the model).
Take a moment to identify each part. The pressure washer unit houses the motor and pump. The high-pressure hose connects the unit to the spray gun, delivering pressurized water. The spray gun controls the water flow and allows you to adjust the spray pattern using the Vario Power lance.
Familiarizing yourself with these components before assembly will streamline the setup process. Refer to the included parts list to confirm you have all necessary items. If anything is missing or damaged, contact Kärcher customer support immediately for assistance. Proper identification is key to successful operation.
What’s in the Box?
Your Kärcher K2 package should include several key components for immediate use. Expect to find the main pressure washer unit, robustly built for reliable performance. A high-pressure hose, typically around 6 meters in length, is included for reaching various cleaning areas. The spray gun, designed for comfortable handling, allows precise control of the water jet.
Furthermore, a Vario Power lance is provided, enabling you to easily switch between different spray patterns – from a gentle fan for delicate surfaces to a concentrated jet for stubborn dirt. Depending on the specific K2 model, you may also receive a detergent suction tube for applying cleaning solutions;
Finally, the box contains a quick-connect fitting for easy hose attachment, and essential documentation including this user manual and safety instructions. Verify all items are present before proceeding with setup.
Identifying Key Parts – Pressure Washer Unit
Let’s familiarize ourselves with the Kärcher K2 pressure washer unit itself. The motor housing encases the powerful electric motor driving the pump. Locate the on/off switch, usually clearly marked for easy operation. The high-pressure outlet is where you connect the high-pressure hose, delivering water to the spray lance.
You’ll also find the water inlet, used for connecting the water supply hose. A filter is integrated within the water inlet to prevent debris from entering the pump. The carrying handle provides a convenient grip for portability. Inspect the cable storage feature, designed to neatly store the power cable when not in use.
Finally, note the pump, the heart of the system, responsible for pressurizing the water. Understanding these components will aid in setup, operation, and maintenance.
Identifying Key Parts – Accessories (Hoses, Guns, Lances)
The high-pressure hose is a crucial component, connecting the pressure washer unit to the spray gun, delivering pressurized water. The spray gun, or trigger gun, controls the water flow; squeezing the trigger activates the spray. Familiarize yourself with the trigger lock for continuous spraying.
The Vario Power Lance is a versatile accessory, allowing you to adjust the spray pressure and pattern – from a gentle wash to a powerful jet. Note the rotating sleeve for pressure adjustment. Some models include a Dirt Blaster Lance, designed for tackling stubborn dirt with a concentrated, rotating spray.

A foam lance (often sold separately) attaches to the lance, enabling the application of detergent for enhanced cleaning. Ensure all connections are secure before operation.
Safety Precautions
Prioritize safety! Before operating your Kärcher K2, carefully review these precautions. General safety warnings include never pointing the spray wand at people or animals, and always wearing appropriate footwear. Avoid using the pressure washer on unstable surfaces.
Electrical safety guidelines are paramount: ensure the power cord is undamaged, and never operate the unit with a damaged cord. Always use a grounded outlet and avoid using extension cords if possible. Do not expose the unit to rain or excessive moisture.
High-pressure spray safety requires caution. The pressurized water can cause serious injury. Never attempt to modify the pressure washer or use incompatible accessories. Always release pressure before disconnecting hoses or accessories.
General Safety Warnings
Crucially, never direct the high-pressure spray towards people, animals, or electrical equipment. Always maintain a safe distance and be aware of your surroundings. Wear closed-toe shoes to protect your feet from accidental spray or debris. Inspect the pressure washer before each use for any signs of damage.
Ensure a stable and level surface during operation to prevent tipping. Do not operate the Kärcher K2 if the power cord or any other component is damaged. Avoid using the machine in areas with flammable liquids or gases. Keep children and unauthorized personnel away from the operating area.
Always disconnect the power supply before performing any maintenance or repairs. Never attempt to modify the pressure washer in any way. Familiarize yourself with the emergency stop procedure before starting.
Electrical Safety Guidelines
Prioritize safety: Always ensure the power supply voltage matches the specifications on the Kärcher K2’s rating plate. Never use an extension cord unless absolutely necessary, and if so, ensure it’s appropriately rated for outdoor use and the machine’s power requirements. Avoid pulling the power cord to disconnect the machine; always grasp the plug.
Do not operate the pressure washer in wet conditions or near standing water. Regularly inspect the power cord for damage – cuts, abrasions, or exposed wires – and replace it immediately if any are found. Never immerse the pressure washer unit in water.
Ensure the electrical outlet is properly grounded. Avoid using adapters or converters. If operating outdoors, use a residual current device (RCD) for added protection. Disconnect the power supply before performing any maintenance or cleaning.
High-Pressure Spray Safety
Exercise extreme caution: The Kärcher K2 generates a powerful, high-pressure spray. Never point the spray at people, animals, or electrical devices. Avoid spraying sensitive surfaces that could be damaged by the force of the water. Always maintain a safe distance – at least 30cm – from the surface being cleaned.
Wear appropriate safety gear, including eye protection and closed-toe shoes. Be mindful of the spray’s recoil force, which can be substantial. Never modify the high-pressure hose or spray lance, as this could compromise safety. Ensure the lance is securely attached before operation.
Release the trigger gun before adjusting pressure settings or changing spray patterns. Never leave the pressure washer unattended while running. Be aware of your surroundings and potential hazards.
Setting Up the Kärcher K2
Preparation is key! Before first use, carefully inspect all components for any damage. Begin by connecting the water supply to the pressure washer, ensuring a secure fit to prevent leaks. Use a standard garden hose with a minimum diameter of 6mm (1/4 inch). Attach the high-pressure hose to both the pressure washer unit and the spray gun, tightening the connections firmly by hand.
Next, connect your chosen lance or accessory to the spray gun, again ensuring a secure connection. Double-check all connections before powering on the device. Proper setup is crucial for safe and effective operation. Ensure the water supply is turned on before activating the pressure washer.

Connecting the Water Supply
Essential first step! Begin by attaching a standard garden hose (minimum 6mm/1/4 inch diameter) to the water inlet on the Kärcher K2. Ensure the hose is fully inserted and the connection is tightened securely by hand – avoid using tools to prevent damage. A water filter is recommended to prevent debris from entering the pump.
Before connecting, verify your water source provides adequate pressure (minimum 10 liters/minute). Turn on the water supply fully before switching on the pressure washer. This prevents damage to the pump caused by running dry. Check for leaks at the connection point and tighten further if necessary.
Attaching the High-Pressure Hose
Secure the connection! Locate the high-pressure hose and firmly push it into the high-pressure connection on the Kärcher K2 unit until you hear a distinct ‘click’. This confirms a secure lock. To release, press the grey locking collar downwards while simultaneously pulling out the hose.
Next, connect the other end of the high-pressure hose to the spray gun. Again, ensure a firm ‘click’ to confirm a secure connection. Regularly inspect the hose for any signs of damage, such as cracks or kinks, before each use. A damaged hose must be replaced immediately for safety. Never use a different hose than the one provided.
Connecting the Spray Gun and Lance
Prepare for targeted cleaning! Take the spray gun and carefully align the lance with the connection point. Push the lance firmly into the spray gun until it locks into place with an audible ‘click’. To detach, press the locking collar on the spray gun and pull the lance straight out.
Ensure the lance is securely fastened before operation to prevent accidental disconnection during use. Different lances offer varying spray patterns; familiarize yourself with each lance’s function before starting. Regularly check the lance for any blockages or damage. A clear lance ensures optimal spray performance. Always point the lance away from yourself and others when connecting or disconnecting.
Operating Instructions
Powering up your K2 is simple! First, ensure the water supply is connected and the unit is plugged into a grounded outlet. Press the power button located on the machine to initiate operation. The power light will illuminate, indicating the unit is ready. To switch off, press the power button again.
Adjusting pressure is key for different cleaning tasks. Utilize the pressure regulator on the machine to select the appropriate setting. Start with a lower pressure and gradually increase it as needed. The Vario Power lance allows for further pressure adjustment directly on the lance itself. Always test on an inconspicuous area first. Remember to always turn off and unplug the machine before any adjustments or maintenance.
Powering On and Off
Initiating operation is straightforward. Before powering on, confirm the water supply is securely connected and the high-pressure hose is properly attached. Ensure the machine is placed on a stable, level surface. Locate the power button – typically a clearly marked switch – on the main unit. Press this button firmly to activate the Kärcher K2.
A green indicator light will illuminate, signaling the unit is ready for use. To safely shut down, press the power button again. The light will extinguish. Always disconnect the power cord from the electrical outlet when the machine is not in use, or during maintenance. Never pull the cord; grasp the plug itself. This prevents accidental activation and ensures safety.
Adjusting Pressure Settings
The Kärcher K2 offers adjustable pressure to tackle diverse cleaning tasks effectively. Pressure control is primarily managed through the Vario Power lance. This lance features a rotating dial allowing you to seamlessly switch between low and high-pressure settings.
Rotating the dial towards the “+” symbol increases the pressure, ideal for stubborn dirt and grime. Conversely, rotating towards the “-” symbol reduces pressure, suitable for delicate surfaces like painted wood or vehicles. Always begin with the lowest pressure setting and gradually increase it as needed. Observe the surface being cleaned to avoid damage. Experimentation is key to finding the optimal pressure for each application, ensuring efficient cleaning without causing harm.
Selecting Spray Patterns (Vario Power Lance)
The Vario Power lance provides versatile spray patterns, adapting to various cleaning scenarios. Rotating the lance’s nozzle adjusts the spray angle, ranging from a narrow, high-impact jet to a wider, fan-shaped spray. The narrow jet is excellent for concentrated cleaning of deeply embedded dirt in hard-to-reach areas.
For larger surface areas, or more delicate cleaning, utilize the wider fan spray. This distributes water over a broader area, reducing the risk of damage. Carefully consider the surface material and the level of dirt when selecting a spray pattern. A wider spray is preferable for washing cars, while a concentrated jet is better for patios. Regularly check the nozzle for blockages to maintain optimal spray performance and consistent cleaning results.
Using Different Accessories
Expand your Kärcher K2’s capabilities with its range of available accessories. These tools unlock specialized cleaning power for diverse tasks around your home and garden. The Dirt Blaster lance delivers a rotating, high-impact spray, ideal for tackling stubborn grime on patios, driveways, and heavily soiled surfaces. Ensure a safe distance to avoid damage.
For applying detergents, the Foam Lance creates a thick, clinging foam that loosens dirt and enhances cleaning effectiveness. Fill the lance’s reservoir with Kärcher detergent, adjust the foam concentration, and apply evenly. Rinse thoroughly after application. Remember to use only Kärcher-approved detergents to prevent damage to your pressure washer and ensure optimal results. Proper accessory use maximizes cleaning efficiency.
Dirt Blaster Lance – For Stubborn Dirt
The Dirt Blaster lance is your go-to solution for deeply ingrained dirt and grime. This accessory utilizes a rotating zero-degree spray pattern, concentrating intense pressure onto a small area. It’s exceptionally effective on concrete, brick, and other hard surfaces plagued by stubborn stains like mildew, algae, or dried mud.
Important safety note: Due to its powerful nature, maintain a safe distance – at least 25cm (10 inches) – from the surface being cleaned. Start with a wider spray pattern and gradually narrow it as needed. Avoid prolonged exposure to a single spot to prevent damage. Always wear appropriate safety glasses and protective clothing when using the Dirt Blaster lance. This lance dramatically increases cleaning power, but requires careful operation.
Foam Lance – Applying Detergent
The Foam Lance transforms your Kärcher K2 into a powerful cleaning system capable of applying detergent effectively. This accessory mixes air, water, and detergent to create a thick, clinging foam that loosens dirt and grime before rinsing. It’s ideal for washing cars, motorcycles, garden furniture, and more.
To use the Foam Lance, fill the detergent reservoir with Kärcher-approved detergent (using other detergents may damage the unit). Adjust the detergent concentration dial to achieve the desired foam thickness. Attach the lance to the spray gun and begin washing, working from the bottom up for optimal results. Rinse thoroughly after application. Caution: Never use the Foam Lance with abrasive cleaners.
Maintenance and Cleaning
Regular maintenance ensures your Kärcher K2 operates efficiently and extends its lifespan. After each use, disconnect the power and water supply. Rinse the exterior of the unit with a damp cloth. Crucially, inspect the nozzle for blockages and clean it with the provided cleaning tool or a fine needle.
The water filter requires periodic cleaning. Remove the filter located in the water inlet and rinse it under running water to remove any debris. For winter storage, completely drain the pump and hoses to prevent freezing damage. Store the unit in a frost-free environment. Ignoring these steps can lead to reduced performance or component failure.
Cleaning the Nozzle
A clogged nozzle significantly reduces the Kärcher K2’s cleaning power. After each use, or when you notice a decrease in pressure, inspect the nozzle for debris. First, disconnect the high-pressure hose and lance; Then, use the provided nozzle cleaning pin, or a fine needle, to carefully remove any blockages from the nozzle’s orifice.
Avoid using metal objects like screwdrivers, as they can damage the nozzle. Gently insert the cleaning tool and move it back and forth to dislodge any accumulated dirt or mineral deposits. Regular cleaning prevents performance issues and ensures optimal spray pattern. Rinse the nozzle with water after cleaning to flush out any remaining particles.
Cleaning the Filter
Maintaining a clean filter is crucial for the Kärcher K2’s performance and longevity. The filter prevents debris from entering the pump, which could cause damage. Locate the filter, typically found where the water supply connects to the pressure washer. Regularly inspect the filter for dirt, sediment, and mineral buildup.
To clean the filter, turn off and disconnect the pressure washer. Unscrew the filter housing and remove the filter element. Rinse the filter thoroughly under running water, using a soft brush to remove stubborn debris. If heavily soiled, soak the filter in a mild detergent solution before rinsing. Ensure the filter is completely dry before reassembling. A clean filter ensures consistent water flow and prevents pump damage.
Winter Storage Preparation
Proper winterization is essential to protect your Kärcher K2 from freeze damage. Before storing for the winter, completely drain all water from the pump, hose, and accessories. Disconnect the water supply and run the pressure washer briefly to expel any remaining water within the system.

Remove the intake filter and allow it to dry thoroughly. A small amount of pump protector (available separately) can be added to the inlet to lubricate the pump during storage. Store the pressure washer in a frost-free environment, such as a garage or shed. Protect the hose from kinks and extreme temperatures. Regular maintenance like this will ensure your Kärcher K2 is ready for spring cleaning!
Troubleshooting Common Issues
Encountering problems? This section addresses frequent issues with your Kärcher K2. If the unit fails to start, check the power supply, ensure the on/off switch is engaged, and verify the safety lock is released. Low water pressure often indicates a blocked filter or kinked hose – inspect and clean accordingly.
Leaking water can stem from loose connections; tighten all fittings. If issues persist, examine the high-pressure hose for damage. Never attempt to repair internal components yourself. For persistent problems, consult the Kärcher website or contact customer support. Regular checks and preventative maintenance can minimize these common occurrences, ensuring optimal performance.
Pressure Washer Not Starting
Is your Kärcher K2 refusing to power on? First, verify the power source – is the outlet functioning correctly? Check the power cord for any visible damage, such as cuts or fraying. Ensure the on/off switch is firmly in the ‘I’ (on) position. The safety lock, located on the spray gun handle, must be released before the unit will start; press it firmly.
Confirm the total stop switch is engaged. If these steps don’t resolve the issue, there might be an internal fault. Do not attempt self-repair. Contact Kärcher customer support for assistance. Always disconnect the power supply before inspecting any components. A non-starting unit often indicates a simple fix, but safety is paramount.
Low Water Pressure

Experiencing weak spray pressure with your Kärcher K2? The most common cause is insufficient water supply. Ensure the tap is fully open and the water flow is unrestricted. Check the inlet filter for blockages – debris can significantly reduce pressure. Remove and clean the filter thoroughly. Also, inspect the high-pressure hose for kinks or damage; replace if necessary.
Verify the spray lance and nozzle are clear of obstructions. A partially blocked nozzle drastically lowers pressure. Try a different nozzle to isolate the issue. If the problem persists, air may be trapped within the pump; Trigger the spray gun for a short period to bleed air from the system. If issues continue, contact Kärcher support.
Leaking Water
Noticing water leaks from your Kärcher K2? First, check all hose connections – ensure they are securely tightened. Inspect the high-pressure hose itself for cracks or damage; even small imperfections can cause leaks. Examine the connections at the pressure washer unit and the spray gun. Replace worn or damaged seals or O-rings if found.

A small amount of water may initially seep from the pump during startup, which is normal. However, persistent or significant leaks require attention. Ensure the lance is properly attached to the spray gun. Avoid over-tightening connections, as this can damage the fittings. If the leak originates from within the pump housing, contact Kärcher customer support for assistance and potential repair options.